Juicy BBQ Pork Loin on Weber Kettle Grill: Hot & Fast at 400F (280C)
Jump straight to the pork loin recipe.
The sizzle of meat, the aromatic blend of smoke and spices, and the satisfying feeling of perfectly grilled pork loin on a summer evening.
I remember my first time attempting to grill a pork loin on the Weber Kettle. The results? Let’s just say they were less than stellar.
However, with each attempt, I began to grasp the nuances of this delightful art.
Soon enough, I was serving up tender, flavorful pork loin that left my guests clamoring for more.
In this guide, I’ll be sharing those hard earned insights, taking you step by step on a journey to master the art of BBQ pork loin on the iconic Weber Kettle.
In This Recipe
- What is BBQ Pork Loin (Not Tenderloin)
- BBQ Pork Loin on the Weber Kettle Recipe Card
- Keep Reading to Learn How To Make This recipe
- Brining vs. Not Brining: Pros and Cons
- Marinating for Enhanced Flavor
- Preparing the Pork Loin For The Weber Kettle
- Essential Tools and Accessories for a Successful Cookout
- Setting Up the Weber Kettle: Creating Indirect Heat
- Smoking the Pork Loin
- Placing the Pork Loin on the Grill
- Adding a Sear at the End: Yay or Nay?
- Innovative Ideas for Bacon Wrapped Pork Loin
- Maintaining the Right Internal Temperature
- Importance of a Digital Meat Thermometer
- Understanding Carryover Cooking
- Checking for Doneness
- Troubleshooting Undercooked or Overcooked Meat
- Resting the Meat for Maximum Juiciness
- Serving and Enjoying the Smoked Pork Loin
- Troubleshooting and Tips
- Experiment and Personalize Your Recipes
- Final Thoughts on the Joys of Cooking Pork Loin on a Weber Kettle Grill
- Frequently Asked Questions
What is BBQ Pork Loin (Not Tenderloin)
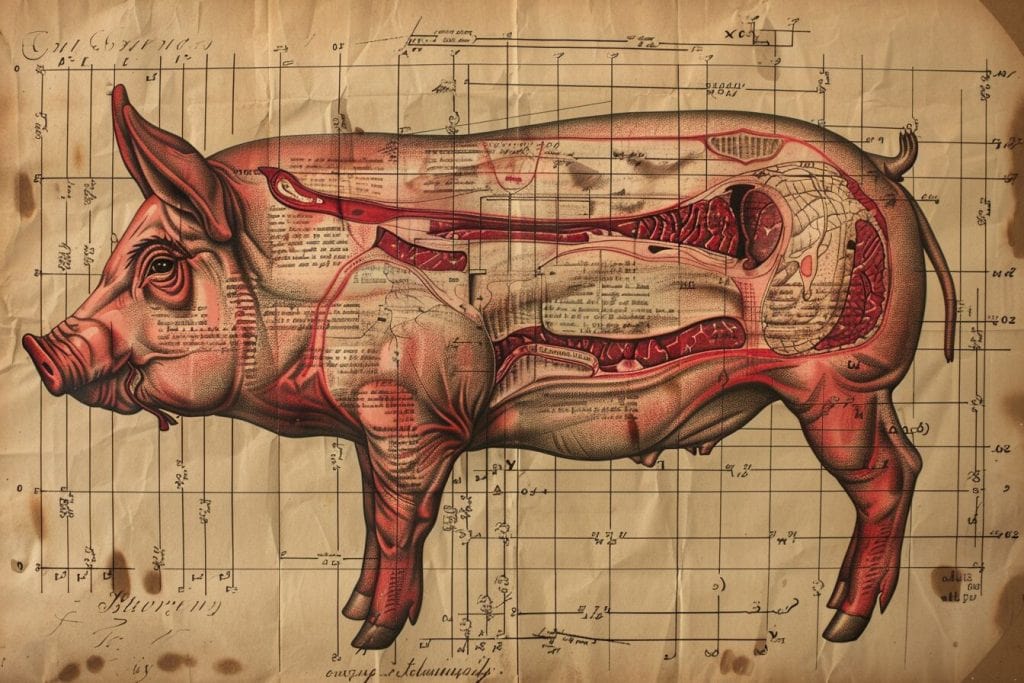
Pork loin is a cut of meat located between the shoulder and the start of the leg. It’s a single large muscle. It is inherently tender, making it a prime choice for grilling. It is a lean cut of meat, which always comes with the risk of drying out if overcooked.
The texture of the pork loin is smooth and even, often with a fat cap on one side.
This fat cap, when left on during grilling, can impart additional flavor and juiciness.
Different Cuts of Pork Loin for Grilling
Navigating the world of pork loin can initially seem daunting, given the myriad cuts available.
Let’s demystify them:
- Center Cut Pork Loin: Often referred to as the center roast. This is the prime cut. It’s lean, tender, and sports a mild flavor. It is ideal for those who want a pure pork experience.
- Pork Tenderloin: Not to be confused with the loin. The tenderloin is a separate muscle that runs alongside the backbone. It’s the most tender part of the pig and cooks quickly. It is best suited for fast, high heat grilling.
- Pork Rib Roast (or Rib End Roast): This cut includes a portion of the ribs and is situated towards the shoulder. It’s a bit fattier, translating to richer flavors when grilled. A personal favorite of mine.
- Sirloin End Roast: Located towards the back end of the loin. This cut is a bit tougher but compensates with deeper flavors. It benefits from longer, slower cooking methods.
When you stand before the meat aisle, armed with this knowledge, selecting the perfect cut becomes less of a gamble and more of a strategic choice.
Choosing the Right Whole Pork Loin for Your Recipe
So, you’ve familiarized yourself with the various cuts, but how do you go about selecting the perfect pork loin for your BBQ session?
Here are some pointers to guide your choice:
- Purpose and Serving Size: Consider the number of guests and the kind of meal you’re aiming for. For intimate gatherings, a tenderloin might suffice. But for larger crowds, a center cut loin or rib roast can be more fitting.
- Fat Content: Always check the fat marbling. A good amount of intramuscular fat (or marbling) promises a juicier end result. Remember that BBQ night when the meat felt a tad too dry? Chances are, it lacked sufficient marbling.
- Color: A fresh pork loin should have a pinkish red hue. Avoid those that appear too pale or have a gray tint.
- Packaging: If buying prepackaged pork loin, ensure the packaging is intact with no punctures. Check for excessive liquid, which might indicate storage issues.
- Ask the Butcher: Don’t be shy. Your local butcher can be a treasure trove of information. Share your plans, and they can guide you to the best choice. It was my butcher who introduced me to the rib roast.
Remember, the foundation of a great BBQ lies in the quality of meat.
Now let’s check out this delicious recipe:
BBQ Pork Loin on the Weber Kettle Recipe Card
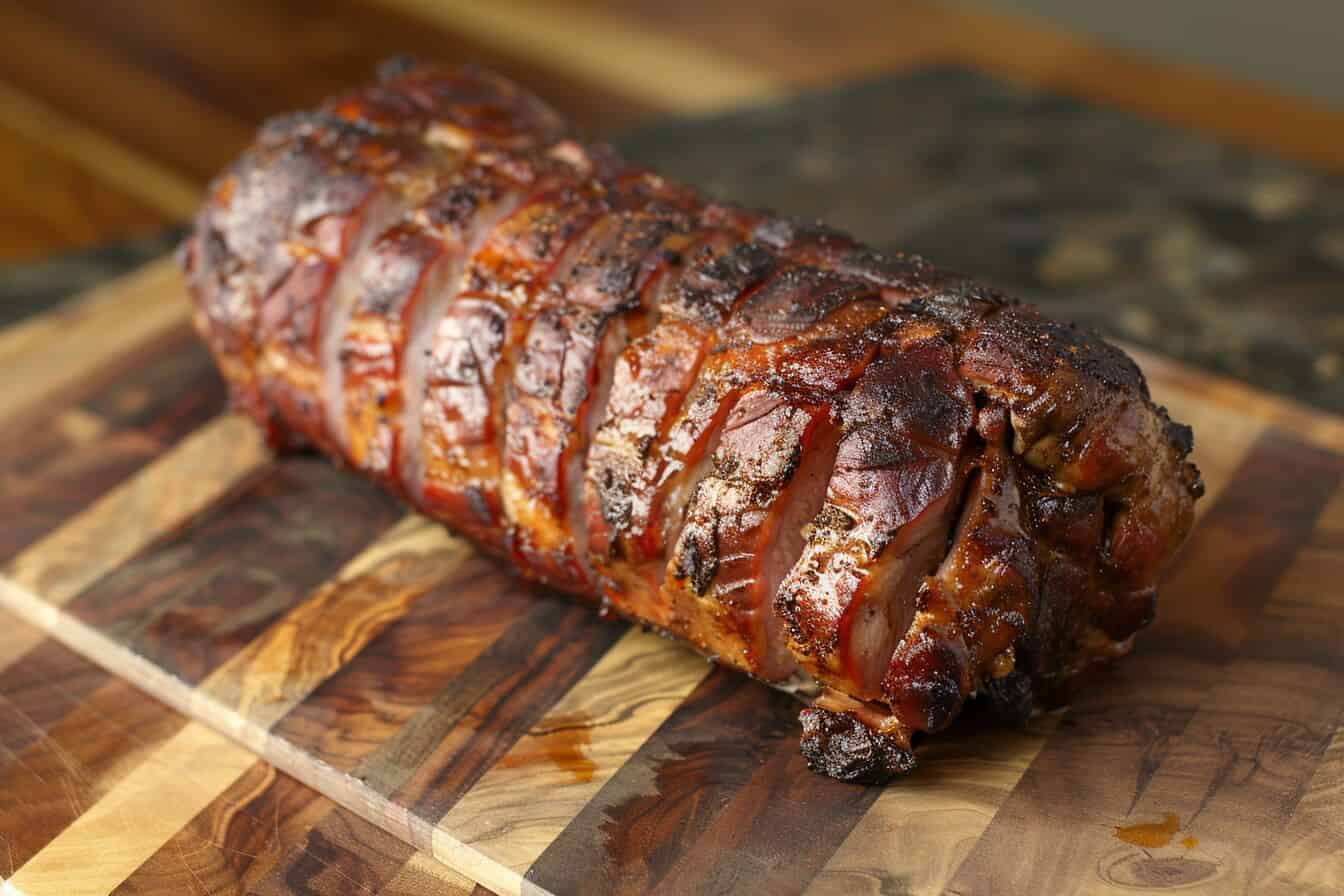
Juicy BBQ Pork Loin on Weber Kettle Grill: Hot & Fast at 400F (280C)
Course: BBQ RecipesCuisine: AmericanDifficulty: Easy12
servings30
minutes1
hour30
minutes300
kcalGrill up succulent BBQ pork loin on your Weber Kettle Grill in no time! Preheat to 400°F (280°C) for quick cooking. Season your pork loin generously, then grill until it’s juicy and caramelized outside, but still tender inside. Perfect for a delicious meal with minimal effort.
Ingredients
1 Pork Loin (approx. 2-3 lbs)
Your choice of marinade or dry rub
Water (for drip pan)
- Equipment
Charcoal (for Weber Kettle)
Wood chunks (apple or cherry recommended)
2 Charcoal Baskets
Drip Pan
Digital Meat Thermometer
Grill Tongs and Spatula
Chimney Starter (optional)
Directions
- Trimming: Trim the pork loin to your tastes.
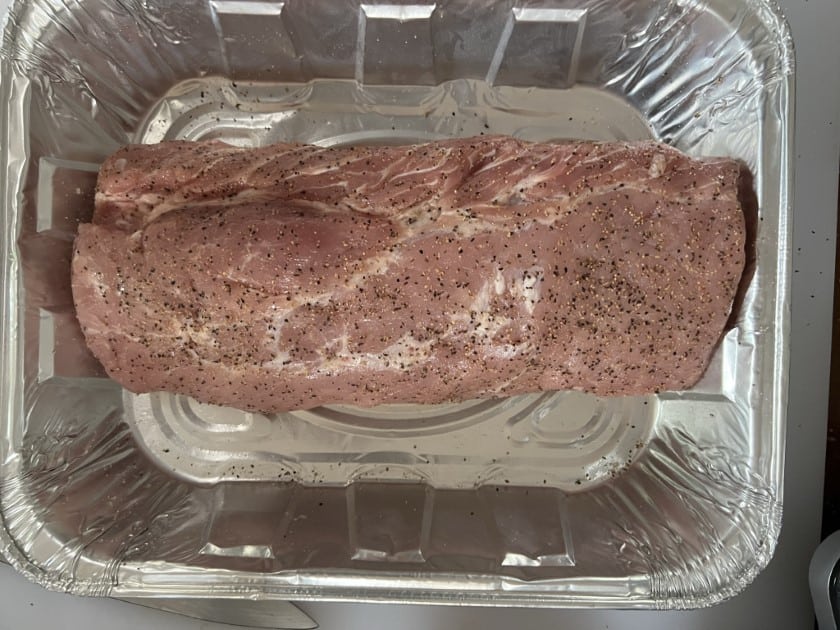
- Preparation: If using a marinade, marinate the pork loin for at least 2 hours. If using a dry rub, apply generously on all sides of the pork loin.
- Grill Setup: Place two charcoal baskets at either end of the Weber Kettle. Between the baskets, place a drip pan filled with a bit of water.
- Charcoal Lighting: Light half a chimney of charcoal. Place 1/3rd of unlit charcoal in each basket. Once the chimney charcoal is ashed over, distribute it evenly between the baskets.
- Temperature Control: Adjust the bottom vent to 1/8th open and leave the top vent fully open to maintain a consistent 400°F.
- Pork Placement: Place the pork loin in the middle of the grill, above the drip pan, ensuring even exposure to indirect heat.
- Smoking: Optionally, add wood chunks to the charcoal for additional smoky flavor.
- Cooking: Monitor the pork loin’s internal temperature. For optimal results, aim for an internal temperature of 135-140°F, accounting for carryover cooking. Rest until it reaches the USDA recommended 145°F.
- Resting: Once off the grill, let the pork loin rest for 10 minutes to allow juices to redistribute.
- Serving: Carve against the grain and serve with your choice of sides and sauces.
Recipe Video
Notes
- For a smoky flavor, consider using apple or cherry wood chips.
- Rotate the pork loin halfway through if needed for even cooking.
- Experiment with various marinades or dry rubs to personalize the recipe.
Keep Reading to Learn How To Make This recipe
Brining vs. Not Brining: Pros and Cons
Ah, the age old debate: to brine or not to brine?
As with many culinary questions, the answer often depends on personal preference and the desired outcome.
Let’s dissect the pros and cons of each method.
The Benefits of Brining
- Enhanced Moisture: Brining involves soaking the pork loin in a saltwater solution. This process helps the meat absorb extra moisture, which can be retained during grilling. This leads to a juicier result.
- Flavor Infusion: The brine can carry flavors deep into the meat. Add herbs, spices, or aromatics to your brine, and you’ll find those flavors subtly echoed in every bite.
- Tenderizing Effect: The salt in the brine can break down some of the meat’s proteins. This makes the pork loin more tender.
Possible Brining Pitfalls
- Time Consuming: Brining requires forethought. For optimal results, a pork loin might need to brine for several hours or even overnight.
- Potential for Over Salting: If not careful, there’s a risk of the meat absorbing too much salt. Over salting leads to an overly salty end product.
The Benefits of Not Brining
- Simpler Process: Skipping the brining step means less prep time. This can be ideal for spontaneous BBQ meals.
- Pure Pork Flavor: Without the influence of a brine, the natural flavors of the pork shine through. This offers a more authentic pork taste.
Risks of Not Brining
- Risk of Dryness: Without the added moisture from the brine, the pork loin might turn out drier. This is a big risk if overcooked.
- Less Flavor Complexity: While the pork’s natural flavors stand out, you might miss out on the deeper flavor profiles that a good brine can introduce.
In my BBQ journey, I’ve experimented with both methods.
There are days when I savor the nuanced flavors of a well brined loin, and others when I crave the unadulterated taste of pure pork.
Ultimately, the choice is yours.
Marinating for Enhanced Flavor
Once you’ve decided on the brining front, it’s time to explore another flavor enhancing technique: marinating.
Why You Should Marinate Your Pork Loin
- Deep Flavor Infusion: Marinades penetrate the meat, introducing new flavors.
- Tenderizing Effect: The acid in marinades can help tenderize the pork loin. It’s essential not to marinate for too long, or the meat can become mushy.
- Versatility: The world of marinades is vast. From tangy citrus based concoctions to spicy, herb filled blends. There’s a marinade for every palate.
Risks With Marinating Pork Loin
- Potential for Over Marinating: As mentioned, marinating for too long can alter the meat’s texture unfavorably.
- Requires Preparation: Marinating requires forethought. Marinating demands a few hours for optimal results.
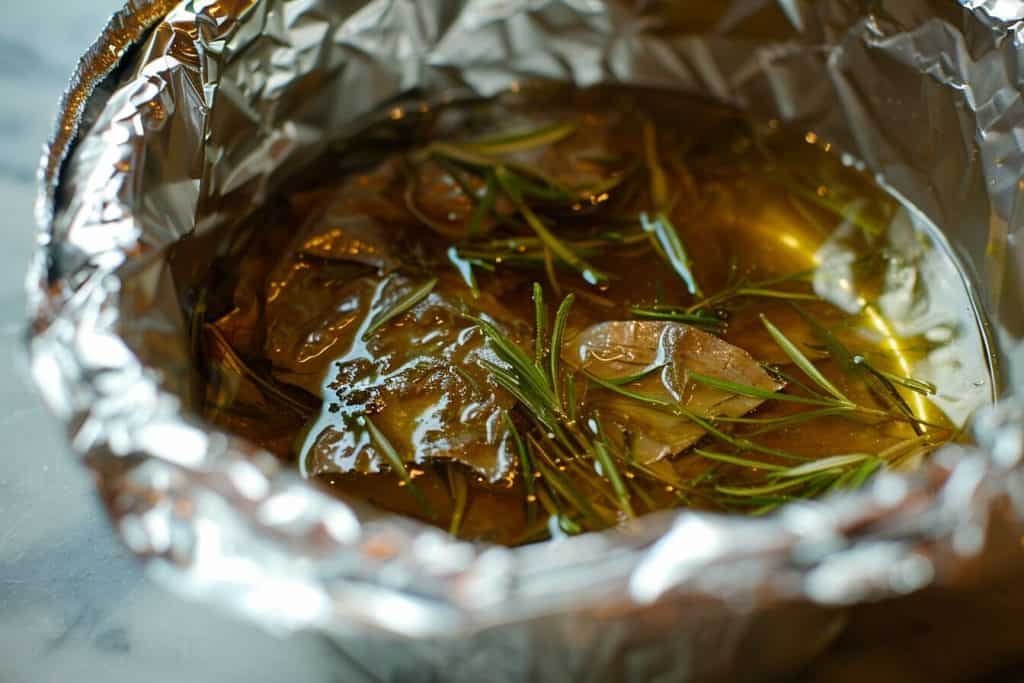
One of my favorite pork marinades is a zesty blend of orange juice, soy sauce, garlic, and chili flakes.
Preparing the Pork Loin For The Weber Kettle
With your chosen cut in hand and a flavor enhancing strategy decided, let’s delve into the preparatory steps to ensure your pork loin is grill ready.
Selecting the Ideal Size and Shape of Pork Loin
It’s crucial to select a pork loin that’s uniform in thickness.
This promotes even cooking, preventing one section from being overcooked while another remains undercooked.
A good rule of thumb is to go for loins that are at least 2 inches thick. This size strikes a balance between manageable cooking times and the retention of juiciness.
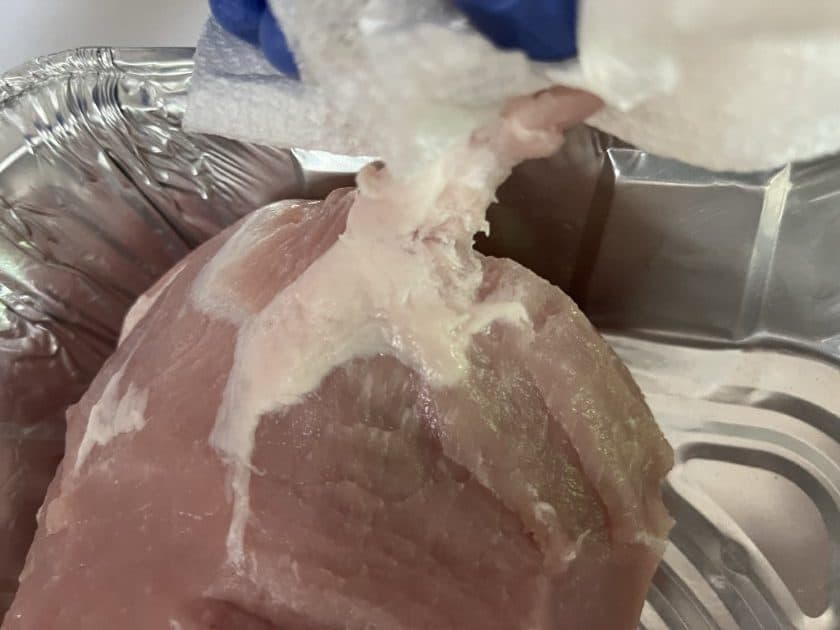
To Trim or Not to Trim: Understanding the Fat Cap
A pork loin often comes with a layer of fat on one side, known as the fat cap.
Some BBQ pitmasters swear by leaving it on, believing it renders down during cooking (basting the meat in its own juices). You can score the fat with a sharp knife to help it render and crisp up.
Others prefer to trim it off for a leaner outcome.
I’ve had delightful experiences both ways. Today I am trimming off the fat cap to give the loin a chance to absorb my sweet Hawaiian rub.
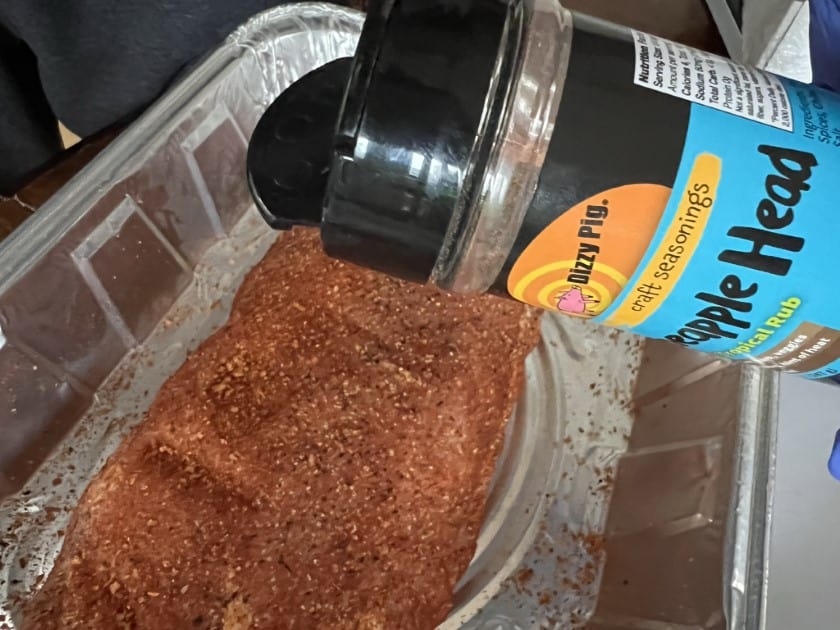
Unique Dry Rub Recipes for Pork Loin
If marinating isn’t your thing, or if you want to layer flavors, dry rubs are the answer.
Season the pork loin with a mixture of ground spices and herbs.
One of my go to BBQ rubs consists of:
- brown sugar
- paprika
- garlic powder
- onion powder
- cumin
- cayenne pepper
- salt
- black pepper
This mix offers a balance of sweet, spicy, and smoky. A trio that sings on grilled pork loin.
As we inch closer to the actual grilling process, setting up your Weber Kettle correctly is paramount.
Here’s a comprehensive guide to ensure you’re on the right track:
Essential Tools and Accessories for a Successful Cookout
- Chimney Starter: This handy tool ensures even lighting of charcoal. Never use lighter fluid.
- Grill Tongs and Spatula: Invest in quality, long handled tools to safely manage your food on the grill.
- Heat Resistant Gloves: Safety first! Protect your hands from the intense heat.
- Digital Meat Thermometer: As you’ll discover later, monitoring the internal temperature is crucial for perfect results.
Setting Up the Weber Kettle: Creating Indirect Heat
Ah, indirect heat, the secret weapon of every seasoned BBQ pitmaster.
Let’s delve into why this method is a game changer for more substantial cuts like pork loin.
The Science Behind Indirect Grilling
Unlike direct grilling (where food is placed directly over the heat source), indirect grilling utilizes the grill’s internal chamber to circulate heat around the food.
Think of it as turning your Weber Kettle into an outdoor oven.
This method ensures the pork loin cooks evenly. It reduces the risk of burning the exterior while the inside remains undercooked.
Mastering Indirect Heat Using Charcoal Baskets
Using charcoal baskets is an ingenious method to achieve an even and controlled indirect heat for grilling.
Let’s delve into this specific technique that harnesses the power of indirect heat using the Weber Kettle:
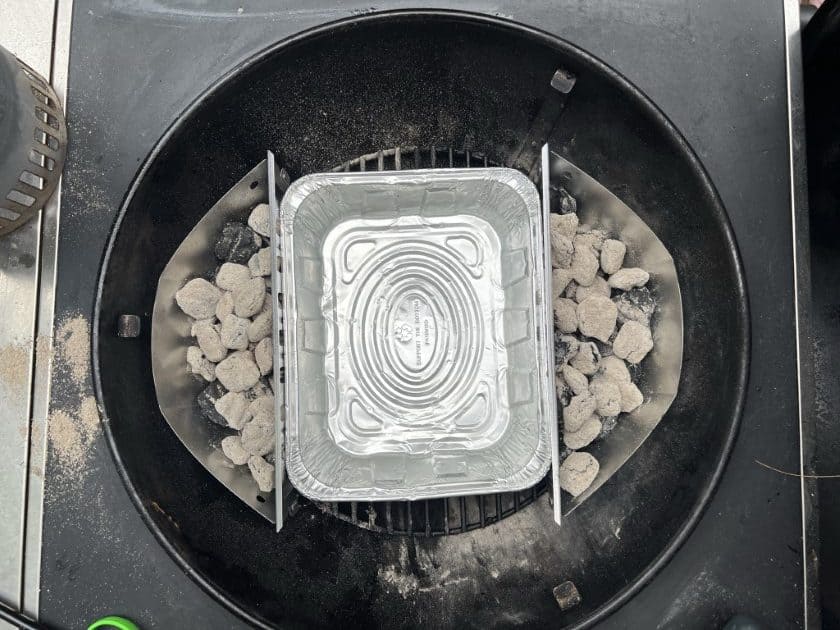
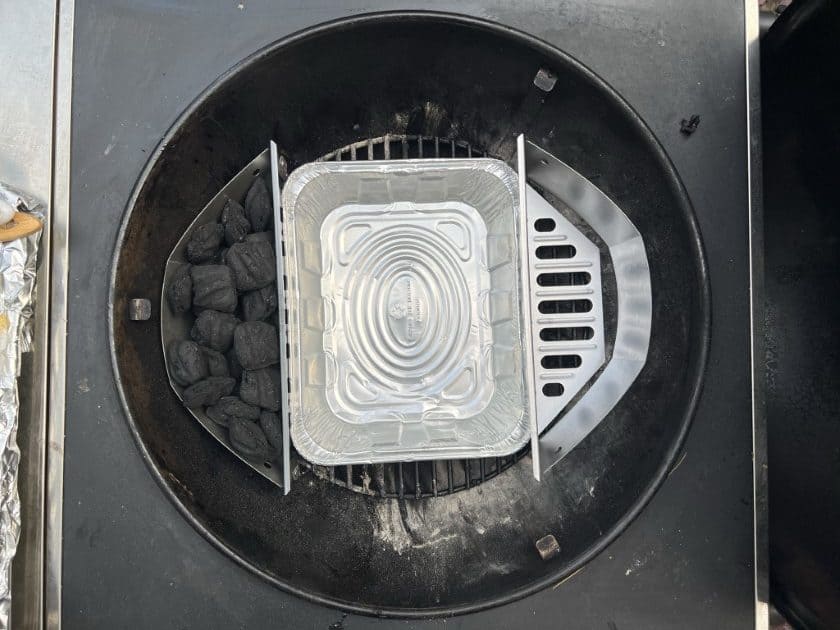
The Setup: Two Charcoal Baskets and a Central Drip Pan
- Charcoal Basket Placement: Position two charcoal baskets at either end of your Weber Kettle.
- Preparation of Charcoal: Begin by lighting half a chimney of charcoal. While it’s heating, fill each charcoal basket about 1/3rd full with unlit charcoal. Once the chimney charcoal is adequately lit and ashed over, distribute it evenly. Pouring half into each basket.
- Drip Pan Introduction: Between the two charcoal baskets, place a drip pan filled with a bit of water. This pan serves a dual purpose:
- It collects any drippings from the pork loin (preventing flare ups),
- Aids in maintaining a moist environment, ensuring the meat remains juicy.
- Pork Loin Positioning: The pork loin should be placed centrally, directly above the drip pan. Make sure it’s not over either of the charcoal baskets. This setup ensures the meat receives consistent, indirect heat from both sides.
Temperature Control and Vent Adjustments
With this specific setup, the goal is to maintain a steady internal grill temperature of 400°F.
To achieve this:
- Bottom Vent: Adjust the bottom vent to be about 1/8th open. This restricted airflow helps control the heat.
- Top Vent: Leave the top vent fully open, ensuring proper airflow and maintaining the desired temperature.
Thanks to the consistent 400°F heat and the strategic placement of the pork loin, you’re set for an evenly cooked, juicy result.
This method, while slightly more intricate, offers precision and control, resulting in BBQ perfection. Every time I’ve used this method, the pork loin emerges with a perfect crust, while the inside is succulent and packed with flavor.
Smoking the Pork Loin
With your Weber Kettle set up for indirect heat and the temperature stabilized at 400°F, it’s time to delve into the art of smoking the pork loin.
Smoking isn’t just about cooking, it’s about infusing the meat with layers of complex smoky flavors.
The Hot and Fast Approach: Benefits and Techniques
Even at 400°F, which is higher than traditional “low and slow” smoking temperatures. The indirect method ensures the pork loin benefits from a gradual cooking process.
The meat’s fibers break down over time, retaining moisture and absorbing the smoky ambiance of the grill.
Wood Choices for the Perfect Smoke Flavor
While your charcoal will provide the primary heat source, adding smoking wood can elevate your pork loin’s flavor profile.
Fruit woods, like apple or cherry, complement pork’s natural sweetness. While hickory or oak introduces a robust, smokier profile.
Water Pan or No Water Pan: Which is Right for You?
With the cooking method we’re using, the water pan plays a pivotal role.
Not only does it prevent flare ups from drippings, but the evaporating water also introduces moisture into the cooking environment.
This helps in keeping the pork loin juicy and can also assist in producing a more consistent smoke.
Avoiding Common Smoking Mistakes
- Over Smoking: While it’s tempting to keep adding wood chunks for more smoke, there’s a fine line between a well smoked pork loin and an over smoked one. Too much smoke can make the meat bitter. Trust the process and resist the urge to add too many chunks.
- Lid Peeking: Every time you lift the grill lid, you’re letting out heat and disrupting the temperature. Be patient, trust your thermometer, and resist the temptation to frequently check on the meat.
Remember, smoking is as much about patience as it is about technique.
With the right setup, wood choices, and a bit of restraint, you’re on your way to serving a smoked pork loin that’s bound to impress.
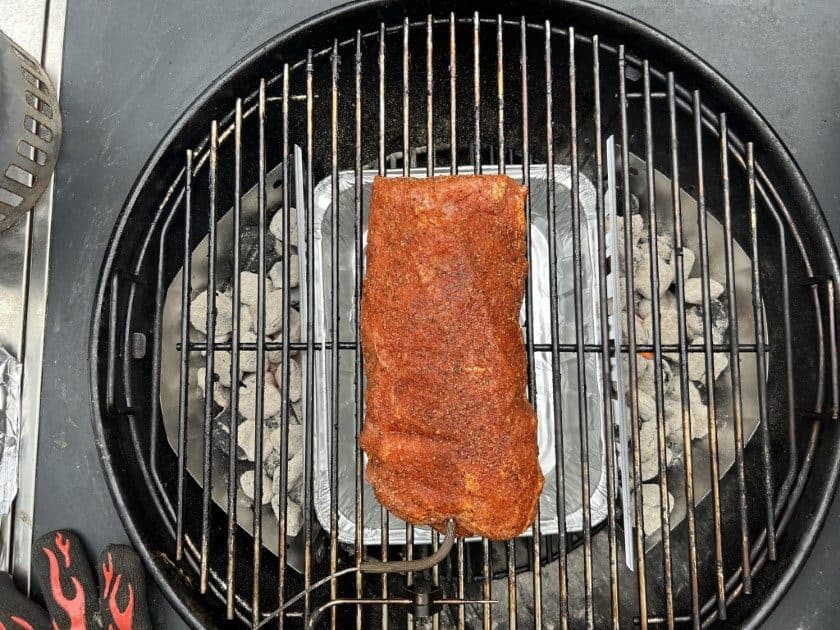
Placing the Pork Loin on the Grill
The stage is set, the coals are glowing, and the aroma of smoke begins to waft through the air.
It’s time to place that beautiful pork loin onto the grill and let the magic happen.
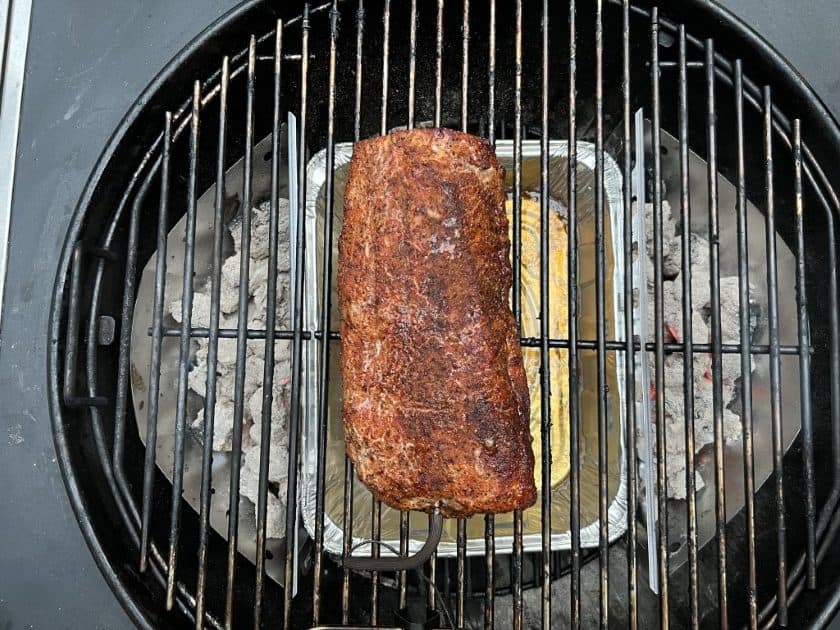
Positioning the Meat for Even Cooking
Given the dual charcoal basket setup, it’s essential to position the pork loin directly in the middle of the grill.
Place it directly above the drip pan.
This ensures the meat is equally distant from both heat sources, facilitating even cooking.
The indirect heat will envelop the pork loin, cooking it uniformly without direct flame contact.
Adding a Sear at the End: Yay or Nay?
A common debate in BBQ circles is whether or not to use direct cooking to sear the pork loin after smoking.
While not necessary, adding a quick sear can enhance the outer crust, giving it a delightful texture.
To sear the pork loin with direct heat:
- Wait until it is nearly done.
- Then move it directly over the coals for a minute or so on each side.
Watch it closely to avoid burning.
Innovative Ideas for Bacon Wrapped Pork Loin
For those who believe everything’s better with bacon (count me in!), consider wrapping your pork loin in a bacon weave before placing it on the grill.
As the bacon crisps up, it imparts a smoky, savory flavor to the pork loin, while also helping to lock in moisture.
The result? A multi textured, flavor packed masterpiece.
Maintaining the Right Internal Temperature
One of the key aspects of producing a perfectly smoked pork loin is ensuring you maintain and monitor its internal temperature.
Given the precise setup of the Weber Kettle and the target temperature of 400°F, this is crucial to achieving that tender, juicy result.
Importance of a Digital Meat Thermometer
A reliable digital meat thermometer is an indispensable tool for any BBQ enthusiast.
By keeping a real time check on the pork loin’s internal temperature, you can ascertain its doneness level and avoid the pitfalls of undercooking or overcooking.
The Art of Probing: Finding the Perfect Spot to Measure Temperature
When inserting the thermometer probe into the pork loin, aim for the thickest part.
Always make sure you’re not touching the bone (if applicable) or hitting the bottom.
This guarantees an accurate reading of the meat’s core temperature, which is vital for determining doneness.
Understanding Carryover Cooking
Carryover cooking is when meat continues to cook even after it’s removed from the heat source. This is thanks to residual heat and can cause the internal temperature to rise by another 5-10°F (2.8 – 5.6°C).
It’s wise to remove the pork loin from the grill a few degrees shy of your target temperature.
For pork loin, the USDA recommends an internal temperature of 145°F, followed by a 3 minute rest.
Once off the grill, let the meat rest.
This allows juices that have been driven to the surface during cooking to redistribute throughout the pork loin, ensuring every bite is juicy and flavorful.
Checking for Doneness
As the aromas from the grill become increasingly tantalizing and your patience is tested, knowing when your pork loin is perfectly done is both an art and a science.
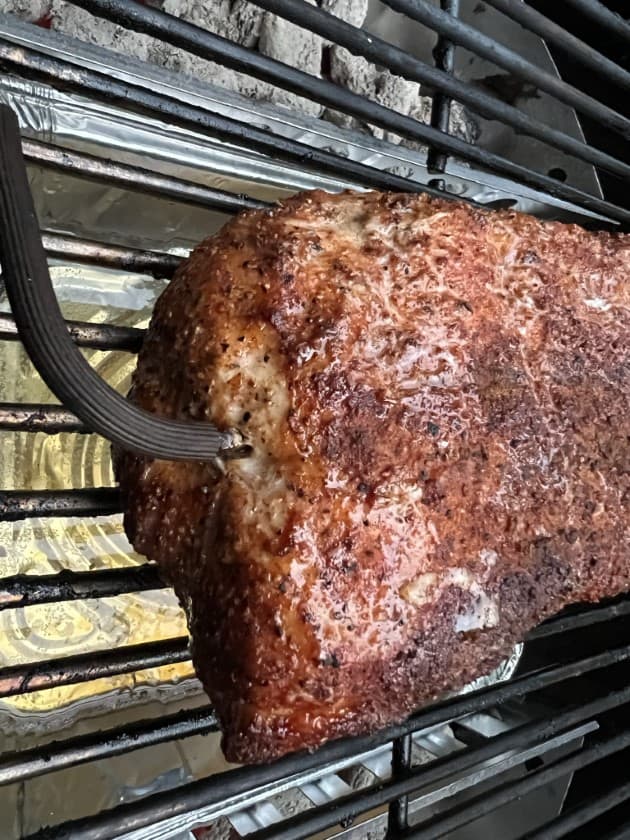
Signs of a Perfectly Smoked Pork Loin
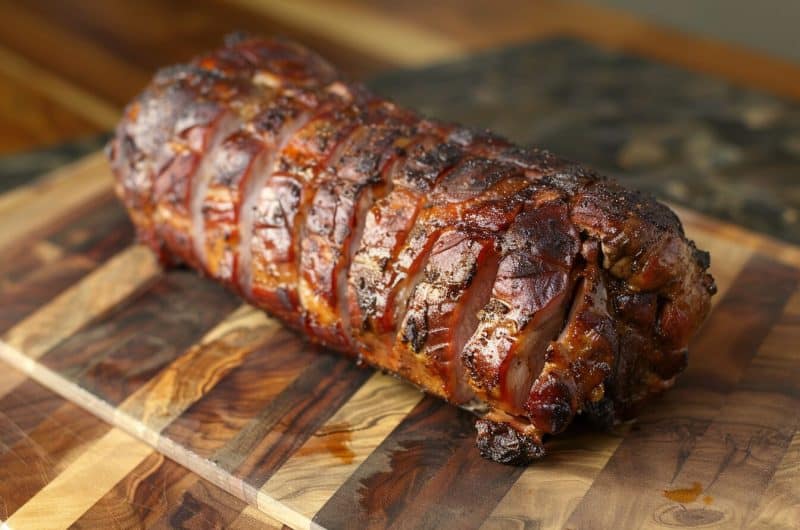
- Color: The outside should exhibit a beautiful golden brown hue.
- Texture: Pressing the meat lightly with your finger should reveal a firm yet slightly yielding texture. It should not feel overly soft or hard.
- Juices: Upon pressing or cutting, clear juices should emerge. If they’re pink or red, it’s an indication the pork loin might need a bit more time on the grill.
Troubleshooting Undercooked or Overcooked Meat
What To Do if Your Pork Loin Is Undercooked
If your thermometer indicates a temperature below the recommended 145°F or the meat seems undercooked, don’t panic.
Simply place it back on the indirect heat zone and continue to monitor it closely.
What To Do if Your Pork Loin Is Overcooked
A pork loin that’s slightly overcooked can still be salvaged.
Consider making a sauce or glaze to pour over the sliced meat, which can reintroduce some moisture and flavor.
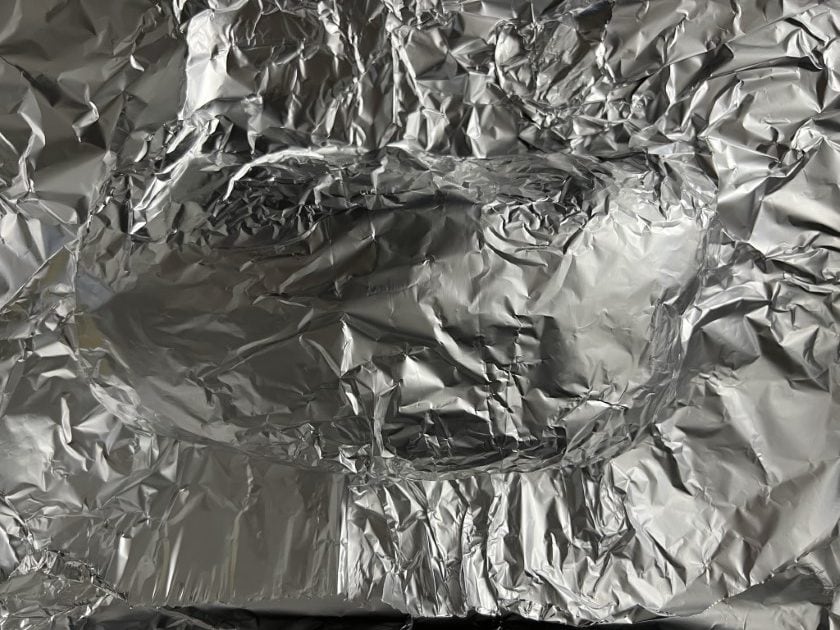
Resting the Meat for Maximum Juiciness
Never underestimate the power of patience.
Once off the grill, let the pork loin rest for at least 10 minutes.
This allows the juices to redistribute, ensuring that your first cut yields a succulent juicy slice.
Every time I have skipped the resting phase the meat has lost a significant amount of its juices upon slicing. Lesson learned!
Serving and Enjoying the Smoked Pork Loin
The culmination of your BBQ journey is here: the moment of serving and savoring the fruits of your labor.
This section offers a guide to presenting your pork loin in style and pairing it with complementary dishes.
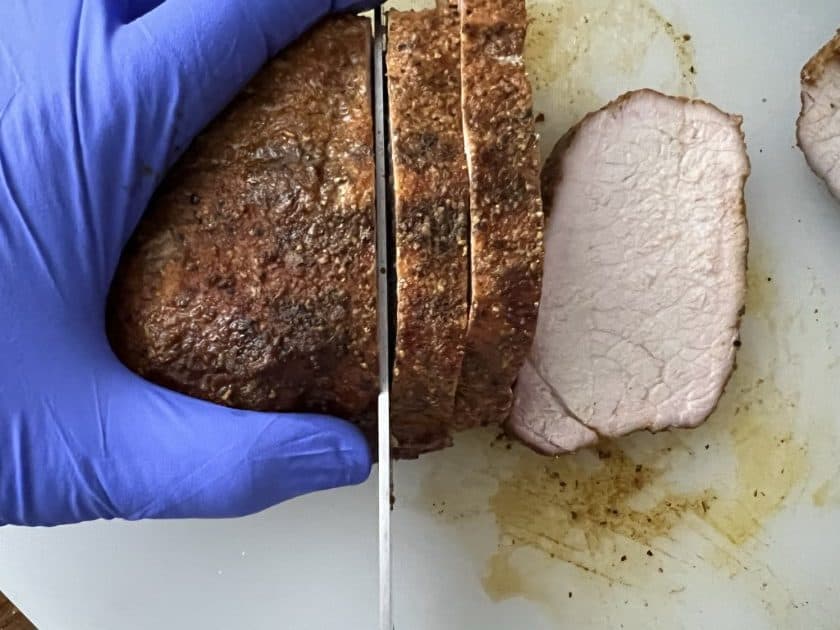
Carving Techniques for a Professional Presentation
- Sharp Knife: Ensure your knife is razor sharp for clean, smooth cuts.
- Cutting Against the Grain: Identify the direction of the meat fibers and slice perpendicular to them. This ensures maximum tenderness in every bite.
- Even Slices: Aim for consistent thickness in your slices. It not only looks professional but ensures even portioning for your guests.
Pairing Sauces and Glazes with Your Smoked Pork Loin
Whether you prefer a tangy apple cider reduction, a spicy BBQ sauce, or a savory gravy, sauces and glazes can elevate the pork loin’s flavor profile.
Suggested Sides and Accompaniments
- Grilled Vegetables: Zucchini, bell peppers, and asparagus grilled alongside the pork loin can be a delightful accompaniment.
- Potato Salad: A creamy or vinegar based potato salad offers a refreshing contrast to the smoky flavors of the pork.
- Coleslaw: A tangy slaw brings a crunchy texture and a burst of freshness.
- Cornbread: Soft, crumbly, and slightly sweet. Cornbread is a classic pairing with any BBQ dish.
Creative Leftover Ideas for Your Smoked Pork Loin
On the off chance that you have leftovers, consider these ideas:
- Pork Loin Sandwiches: Thinly sliced and placed between toasted buns with some coleslaw and BBQ sauce.
- Pork Tacos: Shred the meat and serve with tortillas, salsa, and a dollop of sour cream.
- Pork Loin Salad: Cube the meat and toss it into a salad with mixed greens, cherry tomatoes, and a tangy vinaigrette.
Troubleshooting and Tips
No matter how seasoned a griller you are, sometimes things don’t go exactly as planned.
But fear not! Here are solutions to common issues and some tips to elevate your BBQ experience:
Common Issues With Grilling Pork Loin
- Flare Ups: These sudden bursts of flames can char your meat. If you encounter flare ups, move the pork loin to a cooler section of the grill temporarily. Always keep a spray bottle of water handy to douse any unexpected flames.
- Uneven Cooking: If one end of your pork loin is cooking faster than the other, simply rotate it 180 degrees halfway through the cooking process.
- Overly Smoky Flavor: This can result from too many wood chunks or insufficient ventilation. Make sure to regulate the amount of smoking wood and ensure proper airflow through the vents.
How to Revive Dry or Tough Pork Loin
If your pork loin ends up a bit on the drier side:
- Sauce It Up: A good sauce or glaze can reintroduce moisture and flavor.
- Wrap and Rest: Wrapping the pork loin in aluminum foil and letting it rest can help it reabsorb some of its juices.
- Thin Slices: Carving the loin into thinner slices can make it easier to eat and feel more tender.
Every BBQ session is a learning experience. Whether you’re troubleshooting issues or discovering new techniques, the journey of mastering the art of BBQ is ongoing—and incredibly rewarding.
Experiment and Personalize Your Recipes
Barbecue, at its heart, is as much about personal expression as it is about tradition.
While the guidelines provided here offer a roadmap to a delightful BBQ pork loin, I’d encourage every reader to sprinkle in their own culinary creativity.
Experiment with different marinades, and wood chunks, and try unique sides to complement the pork.
Each BBQ session is an opportunity to craft a new story, to create memories that linger long after the last bite.
Final Thoughts on the Joys of Cooking Pork Loin on a Weber Kettle Grill
There’s an unmatched joy in the ritual of barbecue. The dance of flames, the aroma of wood smoke, the sizzle of meat on the grill.
Cooking pork loin on the Weber Kettle epitomizes this experience, blending tradition with innovation.
It’s not just about the end product. It’s about the journey, the shared moments with loved ones, and the sheer passion for the craft.
Subscribe to our mailing list to barbecue juicy pork loin.
Frequently Asked Questions
How long does it take to smoke a pork loin on a Weber kettle?
Approximately 1.5 to 2 hours, depending on the size of the pork loin and consistent grill temperature.
How long does it take to grill a 2.5 pound pork loin?
Approximately 1.5 hours at 400°F, but always rely on internal temperature for precise doneness.
How long does it take to grill a 2.5 pound pork loin?
Approximately 1.5 hours at 400°F, but always rely on internal temperature for precise doneness.
Do you grill a pork loin fat side up or down?
Grill fat side up. This allows the fat to render and baste the pork loin as it cooks.
Enjoy your BBQ Pork Loin, a perfect centerpiece for any gathering!