Bull Frog Chicken on the Weber Kettle: The New Spatchcock
Ah, the thrill of discovery.
It was on one of my usual weekend BBQ events when I first stumbled upon the Bull Frog Chicken. Not your typical poultry name, right?
While attending a local BBQ fest, I met an old pitmaster who shared with me the art of frogging a chicken. And I must admit, my BBQ experience has never been the same since that day.
It’s something I tried on my trusty Weber Kettle and instantly, I was hooked.
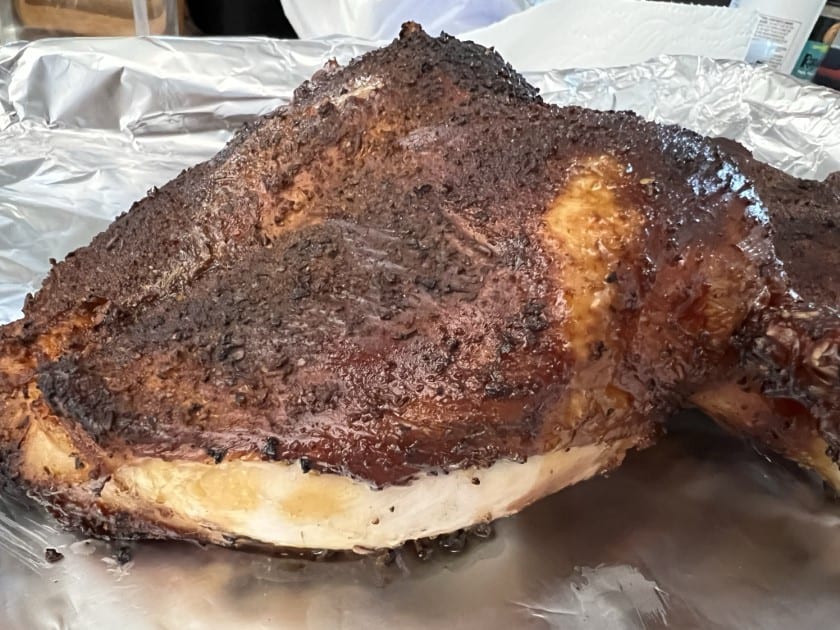
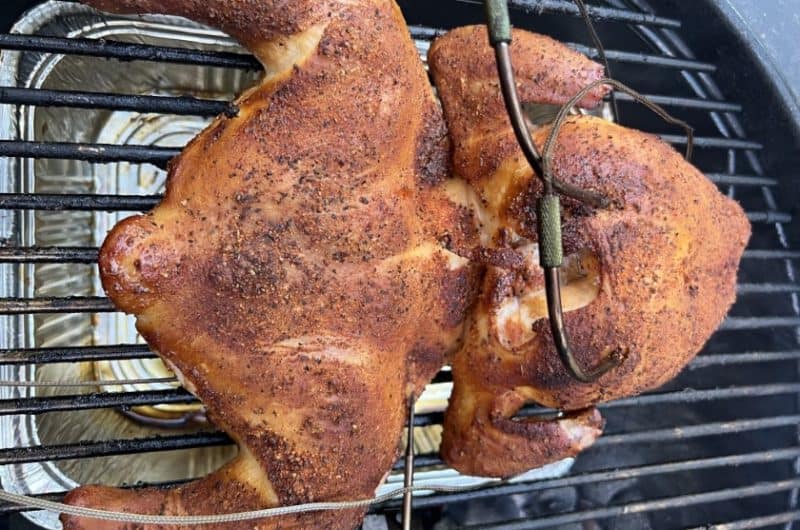
Picture this: crispy skin, juicy meat, and a chicken splayed out in a peculiar yet enticing manner.
Let’s jump (pun intended) into it!
In This Recipe
- What Is Bull Frog Chicken? (The Leaping Frog Chicken)
- Ingredients
- Frogging: Flattening the Whole Chicken (Like Spatchcocking)
- How to Bull Frog a Chicken
- frog chicken vs spatchcock: What Is the Difference Between Bull Frog and Spatchcock Chicken?
- Benefits of Bull Frog Chicken
- Using the Weber Kettle Grill
- Grilling the Frog Chicken
- Tips for Grilling Frog Chicken
- Bull Frog Chicken on the Weber Kettle Recipe
- Wrapping Up Bull Frog Chicken
- Frequently Asked Questions
What Is Bull Frog Chicken? (The Leaping Frog Chicken)
Bull Frog Chicken, often referred to as Leaping Frog Chicken, is a unique method of preparing a whole chicken for grilling, ensuring it gets that enviable crispy skin and succulent interior.
The name stems from the appearance of the chicken once it’s prepped, spread out, limbs apart, much like a frog ready to leap!
I fondly remember my initial reaction when I first saw a bull frog chicken: a mix of intrigue, amusement, and a roaring appetite.
If you’re ready to leap out of the traditional and dive into this extraordinary method, keep reading!
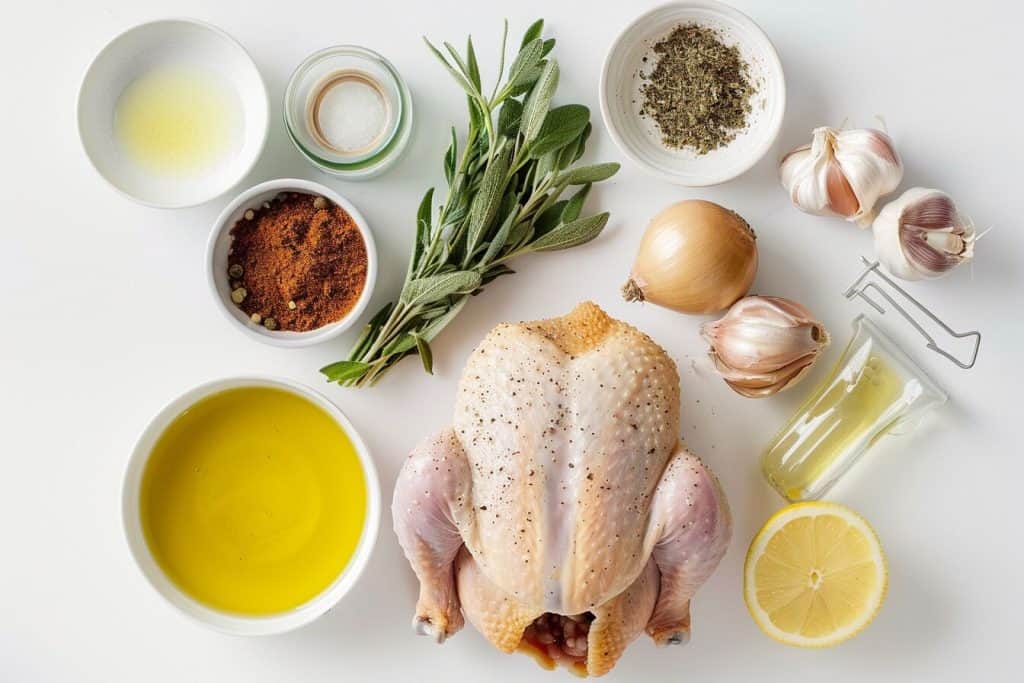
Ingredients
Before we hop into the specifics, let’s gather our ingredients. This will be a simple list, but each component plays a pivotal role in achieving that perfect bullfrog chicken:
- Whole Chicken: Ideally, go for a free range bird. They tend to have a firmer texture and more flavor. Plus, it’s all about that ethical eating, right?
- Olive Oil or Melted Butter: This will be our basting agent, ensuring our chicken stays moist while grilling and achieves that rich golden hue.
- BBQ Rub of Choice: While there are plenty of great commercial options, nothing beats a homemade rub. I personally love a mix of smoked paprika, garlic powder, onion powder, salt, pepper, and a hint of brown sugar.
- Fresh Herbs (optional): Rosemary, thyme, and sage can be stuffed under the skin or sprinkled on top for added flavor.
- Lemon or Lime (optional): For a zesty twist, consider adding lemon or lime wedges inside the chicken or even grating some zest over the top.
- Wood Chips (for smoking): If you’re a fan of that smoky BBQ flavor, some hickory or applewood chips will do wonders.
Remember, while these are the basics, the world of BBQ is all about experimentation. Feel free to mix and match flavors to find your perfect blend!
Frogging: Flattening the Whole Chicken (Like Spatchcocking)
What is Frogging?
Spatchcocking has been the buzzword in the BBQ world for a while now. But hold onto your grill tongs because frogging is here to share the spotlight!
Much like spatchcocking, frogging is a technique to flatten a whole chicken for more even cooking.
However, while spatchcocking involves removing the chicken’s backbone, frogging takes a slightly different approach, which we’ll delve into shortly. The end result? A chicken that resembles a frog with limbs spread out, thus the name Bull Frog Chicken.
When I frogged my first chicken, it felt adventurous and novel, and the results were undeniably delicious.
How to Bull Frog a Chicken
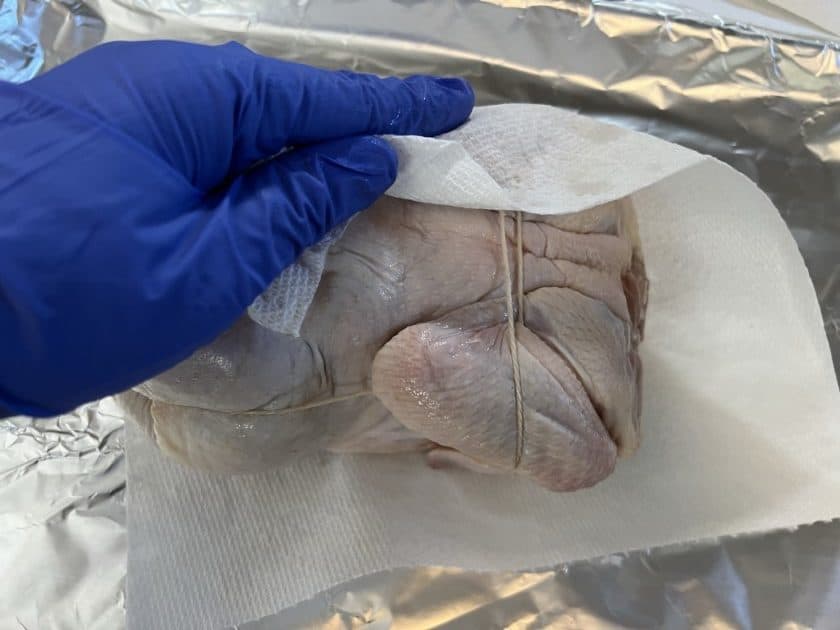
1. Clean and Pat Dry the Chicken
Begin by cleaning your whole chicken and patting it dry with paper towels.
2. Locate the Breastbone
With the chicken breast side down, feel for the breastbone that runs down the center.
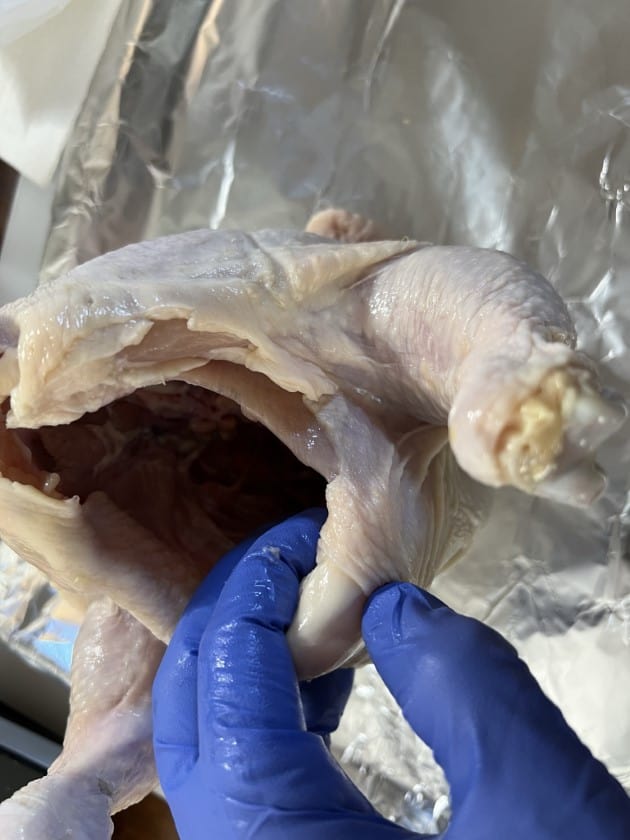
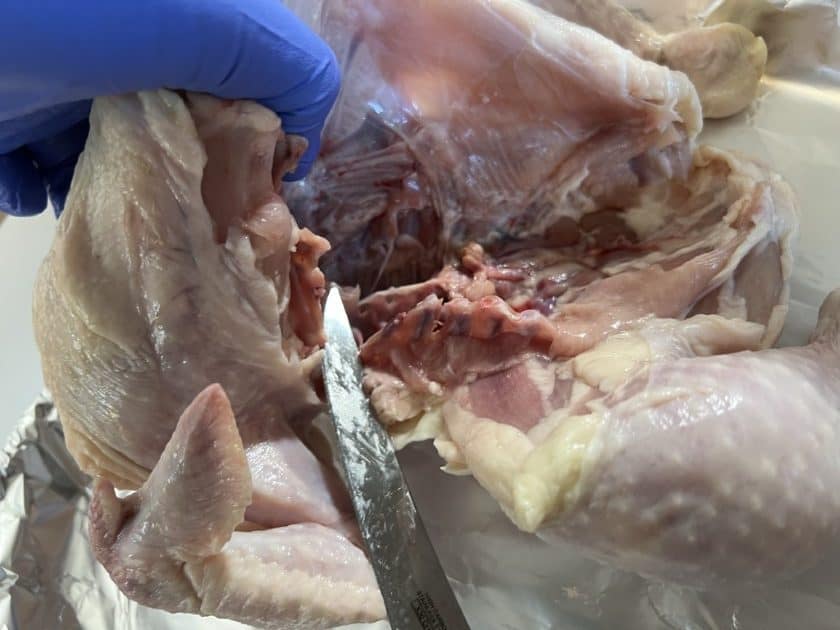
3. Cut Alongside the Breastbone
Using sharp kitchen shears or a knife, make an incision on one side of the breastbone, starting from the neck and working your way down.
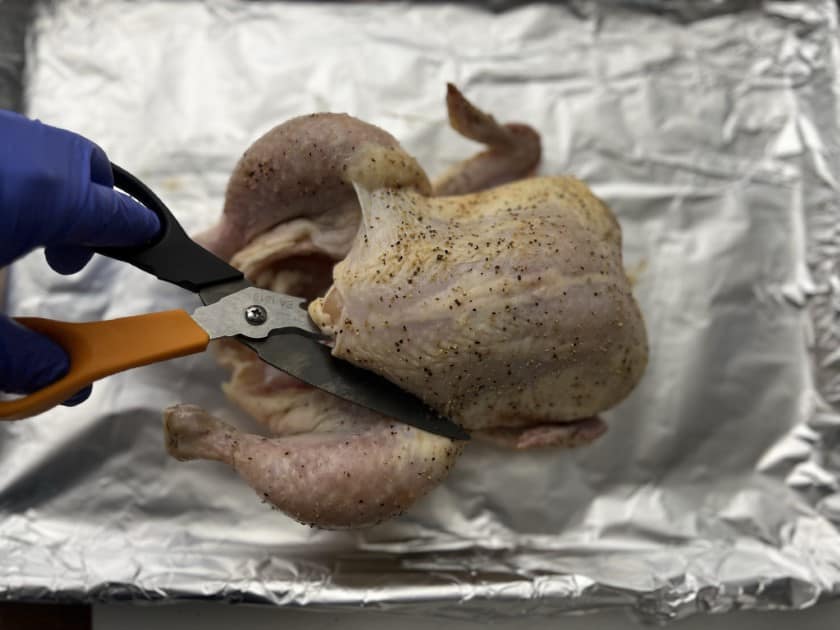
4. Repeat on the Other Side
Make a similar incision on the opposite side of the breastbone.
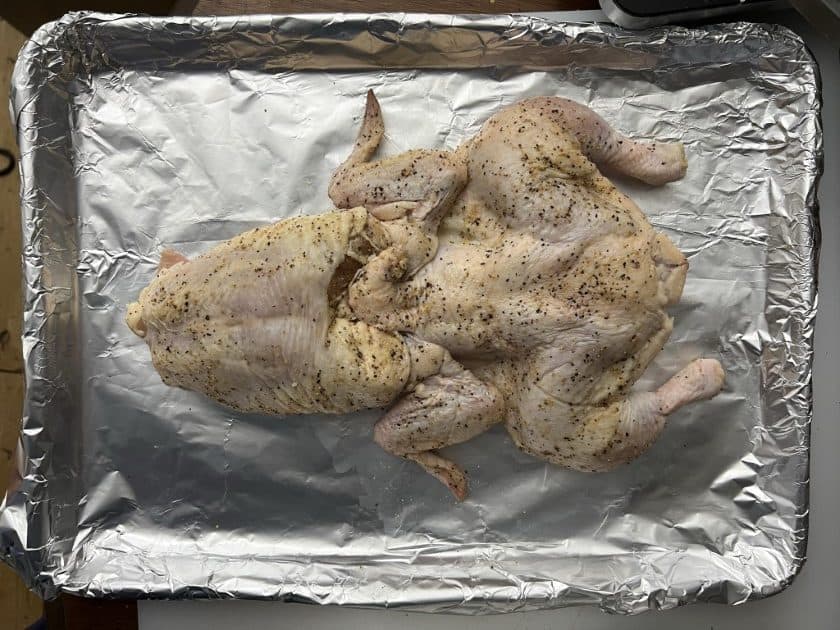
5. Flatten and Spread the Chicken
Flip the chicken over and press down on the breast area until the chicken flattens out, resembling a leaping frog.
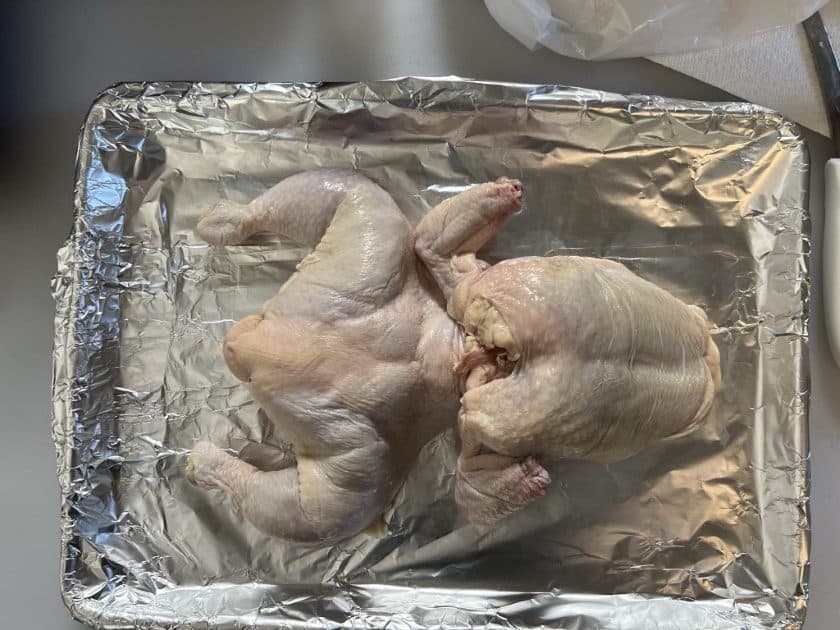
And voila! Your chicken is now ready for the grill. Trust me, once you go frog, you might never go back to the traditional ways!
frog chicken vs spatchcock: What Is the Difference Between Bull Frog and Spatchcock Chicken?
While both bull frog and spatchcock methods serve the purpose of flattening the chicken for even cooking, there are some nuances that set them apart:
Frog Chicken vs Spatchcock differences table
| Feature/Aspect | Bull Frog Chicken | Spatchcock Chicken |
|---|---|---|
| Method of Flattening | Cuts are made down each side of the breastbone to flatten the chicken, but the breastbone remains. | Cuts out the chicken’s backbone to flatten it. |
| Appearance | Resembles a frog about to leap. Legs and wings are spread out more prominently. | Spreads out more uniformly without the pronounced “leaping” posture. |
| Cooking Time | Might cook slightly faster due to its unique posture. | Cooks faster than a traditional whole chicken, but time might vary compared to frogged chicken. |
| Bone Structure | The breastbone remains, giving it a unique texture and carving experience. | With the backbone removed, flipping the chicken is more manageable. |
Both methods have their merits, and it largely boils down (or should I say grills down) to personal preference.
I’ve come to love the allure of bull frog chicken, especially when I’m looking to impress my guests with something out of the box.
Benefits of Bull Frog Chicken
The leap into the world of frog chicken can seem daring, but the results are absolutely worth it!
Let’s delve into the standout benefits that make the bullfrog chicken method a favorite among BBQ pitmasters:
Crispy Skin
The spread out posture of a frogged chicken exposes more surface area to the direct heat of the grill.
This means that as the chicken grills, the skin crisps up beautifully. It’s a crunch lover’s dream!
Every time I serve this at a BBQ, guests rave about the perfect snap of the skin. It’s like music to a griller’s ears.
Juicy Meat
Ever had that disappointing moment when the breast meat turns out dry?
Frogging tackles that problem. By evenly distributing the heat, the chicken cooks more uniformly.
The result is juicy, succulent meat from wingtip to drumstick. My personal trick? A little basting with butter or olive oil during grilling to lock in that moisture.
Using the Weber Kettle Grill
Ah, the Weber Kettle Grill, a classic choice for many BBQ enthusiasts. Its unique design and heat distribution make it an excellent match for frog chicken.
The rounded dome ensures that the heat circulates efficiently, and when paired with the frogging technique, it’s a match made in BBQ heaven.
Using the Weber Kettle Grill
Two zone cooking on the Weber Kettle is a game changer, especially for our bull frog chicken.
It provides both direct and indirect heat zones, ensuring the chicken gets a crispy skin while still being cooked evenly throughout.
Here’s how to set it up:
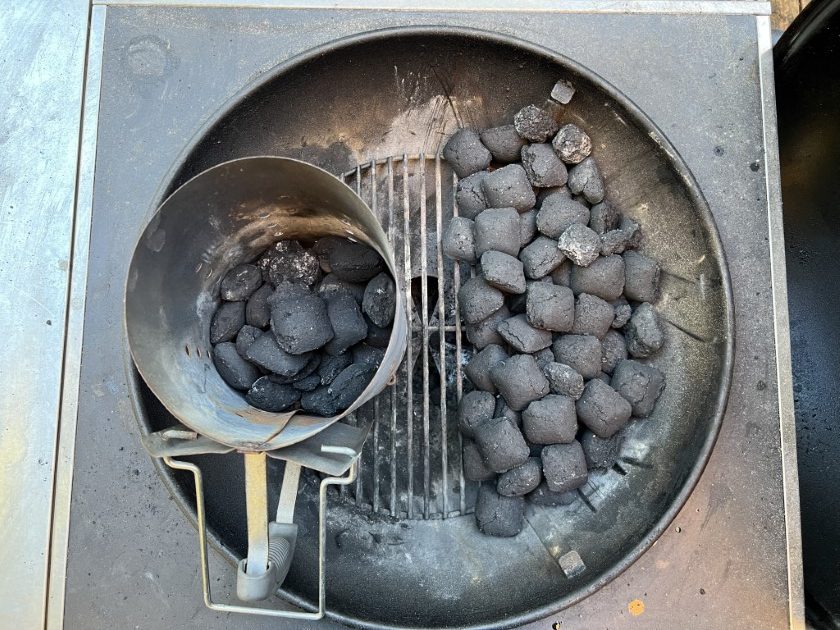
- Pile the Briquettes: On one side of the Weber Kettle, create a dense pile of unlit charcoal briquettes. This will be our direct heat zone.
- Light Your Briquettes: Using a chimney starter, light 30 briquettes. Once they’re ashed over and glowing, pour them over the unlit pile you’ve prepared. This helps in achieving a steady and prolonged heat.
- Add Wood Chunks (optional): If you’re chasing that smoky flavor, sprinkle your favorite wood chunks over the lit briquettes. As mentioned earlier, applewood can be a great choice for chicken.
- Prepare for Indirect Cooking: The side of the grill without briquettes will serve as our indirect heat zone. This is where our frogged chicken will primarily cook, allowing it to be grilled evenly without the risk of being burnt.
- Set Your Vents: Adjust the bottom vent to be about three quarters open and the top vent half open. This setup helps to maintain an optimal grilling temperature for our chicken.
- Preheat and Clean: Place the grill grate, cover with the lid, and allow the Weber to preheat for about 10-15 minutes. Once preheated, ensure to clean the grates with a grill brush before placing the chicken.
With the two zone method in play, you have the versatility to sear and then cook slowly, or vice versa, granting you precision and control over the grilling process.
Setting up the Grill Using the Minion Method
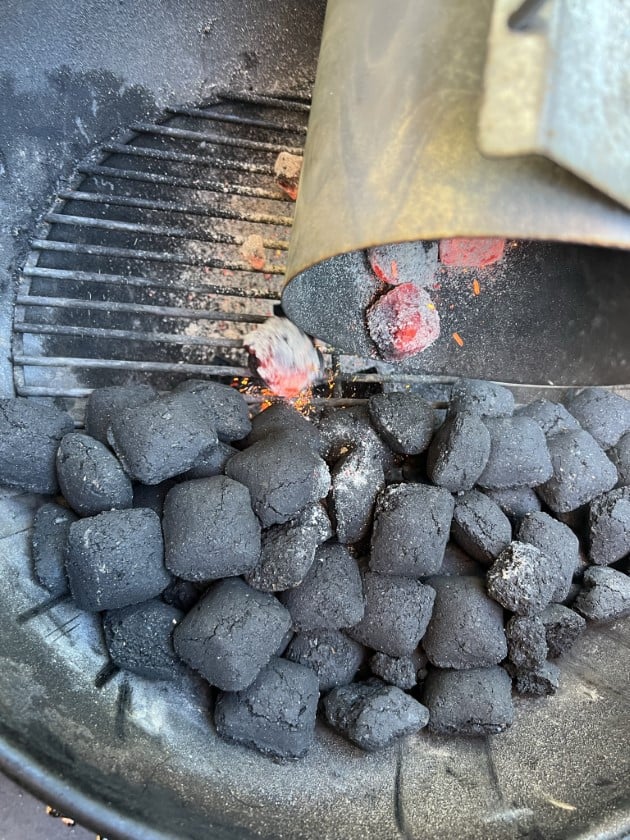
We pour our ashed over charcoal briquettes onto our unlit pile making use of the minion method.
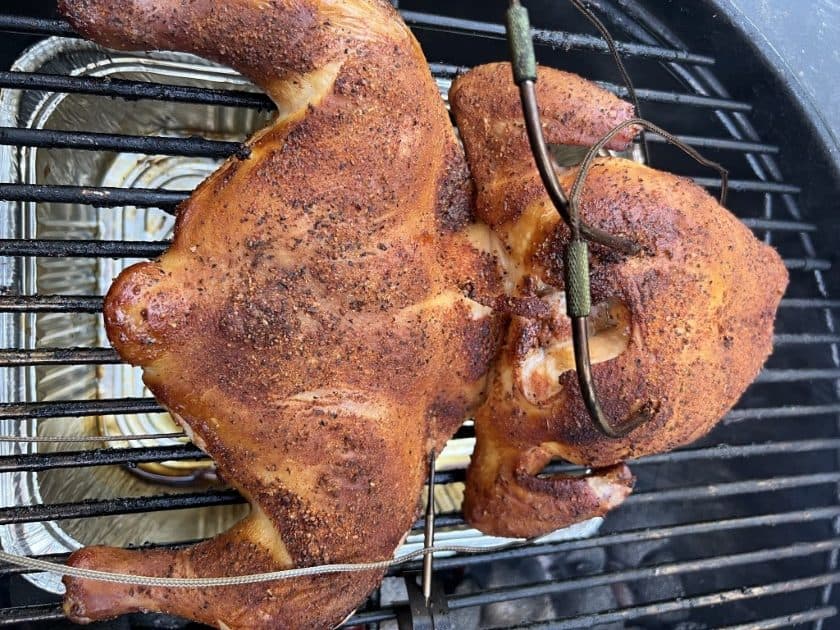
Grilling the Frog Chicken
With our Weber Kettle primed and ready using the two zone method, it’s showtime.
Let’s grill our impressive bull frog chicken to crispy skinned perfection:
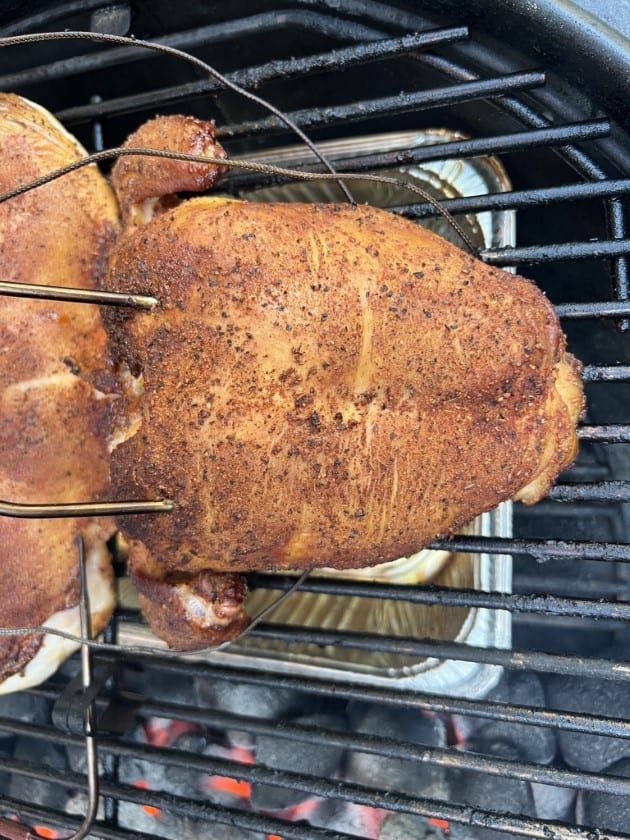
- Season the Chicken: Prior to grilling, ensure your chicken is well seasoned. A combination of salt, pepper, garlic powder, and smoked paprika can offer a tantalizing crust. But the beauty of BBQ is its versatility, so don’t hesitate to explore with your seasoning!
- Grill on Indirect Heat: Lay your seasoned frog chicken, breast side up, on the cooler side of the grill (the indirect heat zone). Aim to maintain a grill temperature between 350°F to 375°F. This will ensure the skin crisps up nicely while the meat stays juicy.
- Monitor Temperature: Keeping tabs on the chicken’s internal temperature is key. For poultry, target an internal temperature of around 165°F (74°C) in the thickest part of the breast.
- Crisping the Skin: As the chicken approaches the desired internal temperature, the elevated heat of 350°F to 375°F on the indirect side will naturally crisp up the skin. No need to move the chicken directly over the coals.
- Rest and Serve: Once you’ve achieved grilled perfection, remove the chicken from the grill and let it rest for about 10 minutes. This patience will be rewarded as it allows the juices to settle, ensuring every bite is succulent. Slice, serve, and bask in the BBQ glory.
I still recall the gasps of admiration and surprise when I unveiled a bull frog chicken at a family gathering. The crispy skin, the juicy meat, and the playful twist on presentation always make it a hit!
Tips for Grilling Frog Chicken
Grilling a bull frog chicken is a thrilling culinary experience, but a few tips can elevate the outcome even more.
As someone who has had their fair share of BBQ successes (and a few mishaps), here are some nuggets of wisdom:
- Brine Ahead: If you’ve got the time, brining the chicken for a few hours or overnight can elevate its juiciness. A simple solution of water, salt, sugar, and your choice of herbs can do wonders.
- Rub It Right: Don’t just season the outside; make sure to get your seasoning underneath the skin and inside the cavity. It’s these little details that ensure flavor in every bite.
- Keep the Lid Down: Resist the temptation to frequently open the grill lid. Keeping it closed maintains consistent temperature and ensures even cooking.
- Watch the Flare ups: Even though we’re cooking indirectly, drippings can cause flare ups. Always have a spray bottle of water on hand to manage any unexpected flames.
- Invest in a Good Meat Thermometer: Eyeballing is risky, especially with poultry. A reliable meat thermometer removes the guesswork and ensures safety.
- Let It Glow: Waiting until your charcoal briquettes are ashed over and glowing ensures a consistent and clean heat source.
- Patience is BBQ’s Best Friend: Good BBQ is never rushed. Allow the chicken to cook at its own pace. It’s this slow cooked love that brings out the best flavors.
- Be Playful with Wood Chips: If you’re after a smokier flavor, experiment with different wood chips or chunks. Cherry, hickory, or mesquite can each add their unique twist.
- Safety First: Always ensure you’re practicing safe food handling, especially with poultry. Clean hands, clean utensils, and a clean grill are paramount.
Armed with these tips, your bull frog chicken grilling adventure on the Weber Kettle is set to be a showstopper.
Bull Frog Chicken on the Weber Kettle Recipe
Bull Frog Chicken on the Weber Kettle: The New Spatchcock
Course: BBQ RecipesCuisine: AmericanDifficulty: Easy4
servings30
minutes1
hour30
minutes700
kcalOnce you frog your first chicken you’ll never go back to spatchcocking again. Bull Frog Chicken is the best way to flatten a whole chicken.
Ingredients
1 whole chicken (4-5 pounds)
Salt, pepper, garlic powder, and smoked paprika (or your choice of seasoning)
Charcoal briquettes
Wood Chunks (Optional)
Directions
- Preparation: Clean and pat dry the chicken. Frog the chicken by cutting down each side, leaving it flattened but with the breastbone intact.
- Season: Apply your seasoning generously both outside and under the skin. For an enhanced flavor profile, consider brining the chicken in advance.
- Grill Setup: Employ the two zone cooking method on the Weber Kettle. Pile unlit briquettes on one side and light 30 briquettes in a chimney. Once ashed over, place them over the unlit pile. Adjust vents to maintain a temperature of 350°F to 375°F.
- Grill: Place the chicken, breast side up, on the indirect side of the grill. Keep the lid down and monitor the internal temperature. Aim for 165°F (74°C) in the breast.
- Rest and Serve: Once done, allow the chicken to rest for 10 minutes to let the juices redistribute. Carve and serve.
Recipe Video
Notes
- Consider brining the chicken for enhanced juiciness.
- Invest in a reliable meat thermometer for precise cooking.
- For a smokier flavor, use wood chunks like applewood or hickory.
Wrapping Up Bull Frog Chicken
And there you have it, the quintessence of BBQ exploration and a journey through the intriguing world of Bull Frog Chicken.
The technique brings a fresh twist to grilling, blending the art and science of cooking to perfection.
As we wrap up, remember that the essence of great BBQ lies in experimentation and the joy of sharing these delicious creations.
Here’s to your next BBQ exploration!
Frequently Asked Questions
How do you leapfrog a chicken?
Leapfrogging a chicken, also known as bull frogging, involves cutting down each side of the chicken to flatten it, without removing the breastbone or backbone.
What is the alternative to Spatchcocking?
The alternative to spatchcocking is the bull frog method, where the chicken is cut down its sides to flatten without removing the breastbone or backbone.
How to make a whole chicken into a flattie?
To make a whole chicken into a flattie, you can use the frog method by cutting down each side of the ribcage of a chicken and pressing down to flatten it.
How long to smoke frog chicken?
Smoking a frog chicken typically takes 2-3 hours at around 250°F to 275°F.