Vent Settings & Charcoal Amounts: Controlling the Weber Kettle Temperature
Jump to the how much charcoal to use and where to set the vents lookup table.
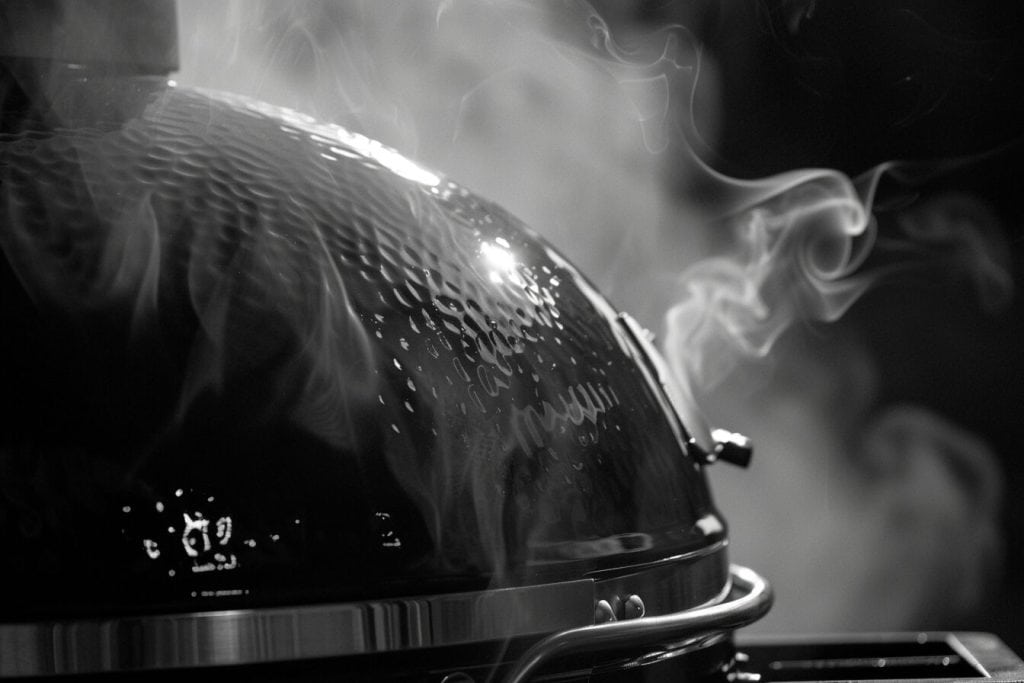
Where you set the vents and how much charcoal you light makes all the difference
Have you ever bitten into a perfectly grilled steak? The secret behind that delicious bite is the right cooking temperature.
The Weber Kettle Grill is loved by many for BBQ. But, to get the best results, you need to control its temperature.
This guide will show you how to do just that. You’ll be a master at controlling the Weber Kettle temperature in no time.
In This Article
- Where you set the vents and how much charcoal you light makes all the difference
- The Three Big Challenges with Controlling the weber Kettle Temperature (And grills in general)
- The Pitfalls of Using a Full Chimney: You Can’t Control The Temperature
- The Minion Method: Your Game Changer For Precision Control
- Getting The Temperature Right: Mastering the Top and Bottom Vents
- Kingsford vs Weber Charcoal Briquettes: Brand Differences
- Weber Kettle Vent Settings: Specific Temperature Control Guide
- How Many Hot Charcoal Briquettes to Start in Your Chimney?
- Where to Start The Vents?
- How to Keep Your Weber Kettle at 225 – 250°F (107 – 121°C)
- How to Keep Your Weber Kettle at 275°F (132°C)
- How to Keep Your Weber Kettle at 300°F (149°C)
- How to Keep Your Weber Kettle at 325°F (163°C)
- How to Keep Your Weber Kettle at 350°F (177°C)
- How to Keep Your Weber Kettle at 375°F (177°C)
- How to Keep Your Weber Kettle at 400°F (204°C)
- Maintaining Your Target Temperature on Your Weber Kettle Grill
- Tips and Tricks for Controlling Charcoal Grill Temperature
- Now You Can Control Temperature With Military Precision
- Frequently Asked Questions
The Three Big Challenges with Controlling the weber Kettle Temperature (And grills in general)
Controlling the temperature of a grill can be tricky.
Most grillers face three common problems:
- Hitting the Target: How do you get your grill to the exact temperature you want?
- Steady Cooking: Once you hit your goal, how do you keep the temperature from going up or down?
- Making Adjustments: If things aren’t perfect, how can you use the vents to adjust the heat?
Understanding these challenges is the first step to mastering the art of grilling.
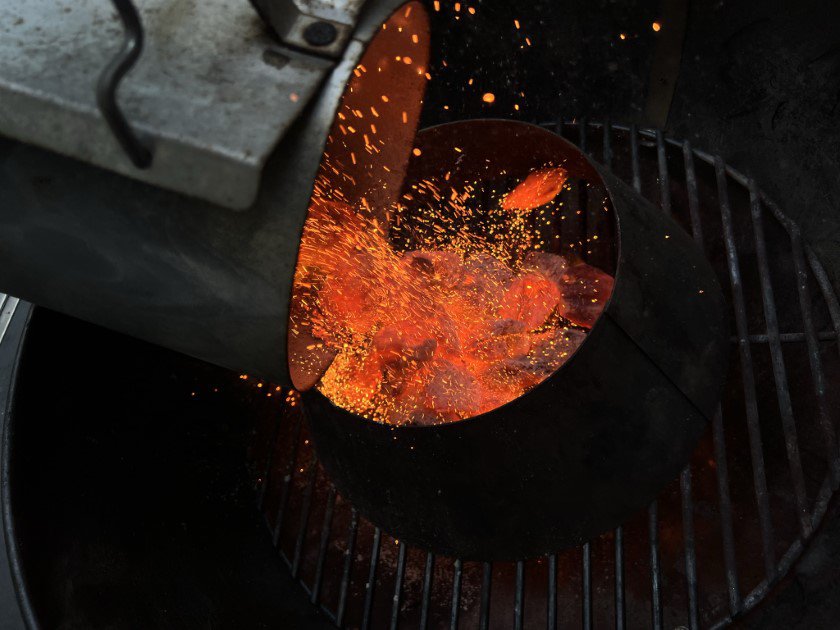
The Pitfalls of Using a Full Chimney: You Can’t Control The Temperature
Starting with a full chimney of blazing briquettes might seem like a good idea.
More heat means a faster start, right?
But this common approach can often lead you down a tricky path.
Let’s delve into why:
Sky High Temperatures
Pouring a full chimney into your grill can send your temperature soaring. Often to a blistering 500 – 600°F (260 – 315°C).
It’s like trying to bake cookies in an oven set to broil!
Playing the Waiting Game:
If your goal is a steady 225 – 250°F (107 – 121°C), starting so hot means you’re just playing the waiting game.
You’ll be twiddling your thumbs, hoping the temperature drops soon. All while your precious cooking time slips away.
Harder Temperature Control
It’s tough to control the temperature when there are so many red hot briquettes.
It’s like trying to tame a wild horse, not impossible, but tough!
Starting with the right amount of heat makes your grilling experience smoother. It’s more predictable, and most importantly, easier.
The Minion Method: Your Game Changer For Precision Control
Imagine starting a campfire.
You wouldn’t toss in a massive log right away.
Instead, you’d begin with a few twigs and let the fire grow gradually.
The Minion Method embraces this very idea for your kettle grill.
What Is The Minion Method?
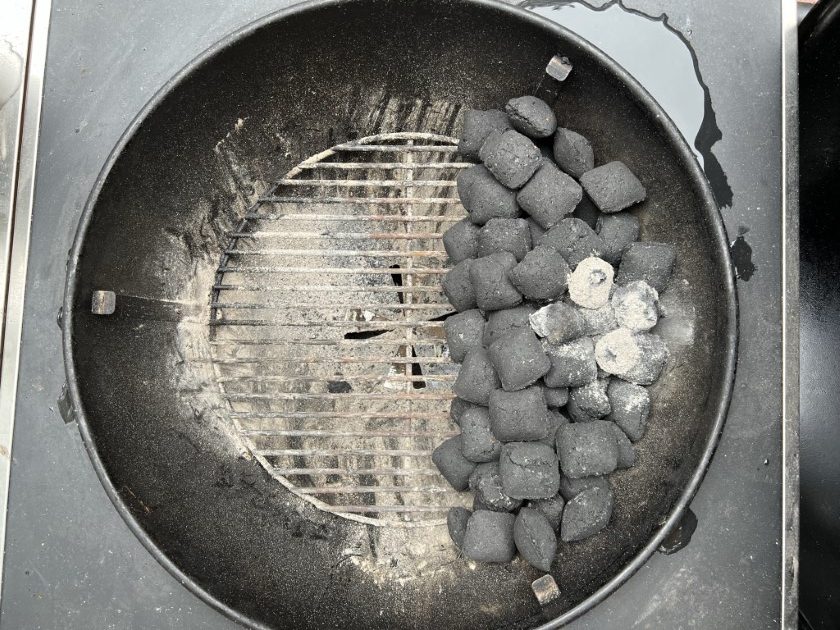
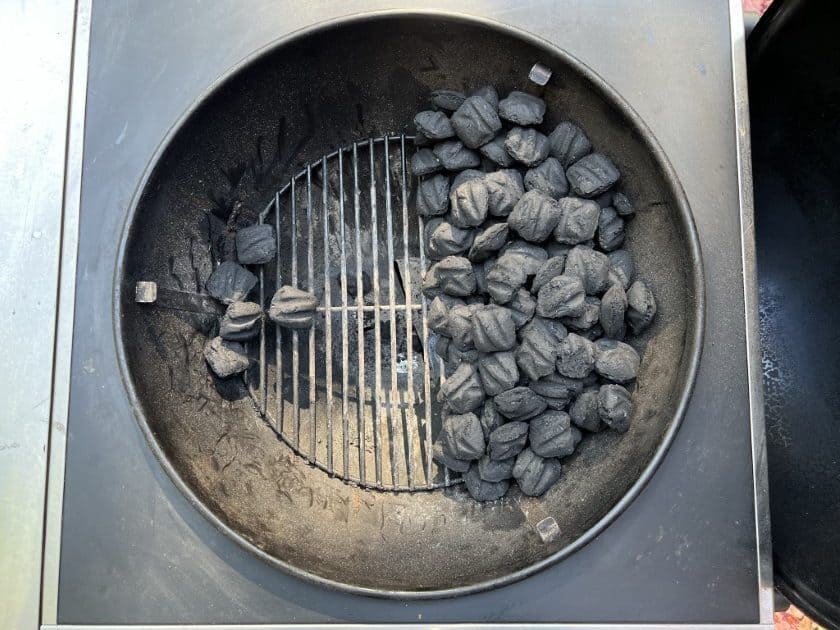
The Minion Method involves placing a small number of hot coals on top of unlit charcoal briquettes.
Instead of starting with a lot of hot coals, you use just a few. These coals ignite the unlit ones, gradually.
As they burn slowly, you get consistent heat.
This method is efficient for both low and slow and direct cooks.
How To Do It?
Simply place a few lit coals (5 or 6 for a low and slow cook of 225 – 250°F or 107 – 121°C) on top or the edge of a pile of unlit charcoal.
These lit coals act as your initial heat source, while the unlit ones become your extended fuel.
Why It Is Brilliant?
With this method, you don’t get a temperature spike.
Instead, you’re gifting your grill a gradual, controlled burn.
You’re starting with just enough lit briquettes to reach your target temperature, and no more. It’s a slow dance of heat, not a disco inferno.
Looking for consistency? Want to avoid the guesswork? Consider giving the Minion Method a try, it could become your new best friend.
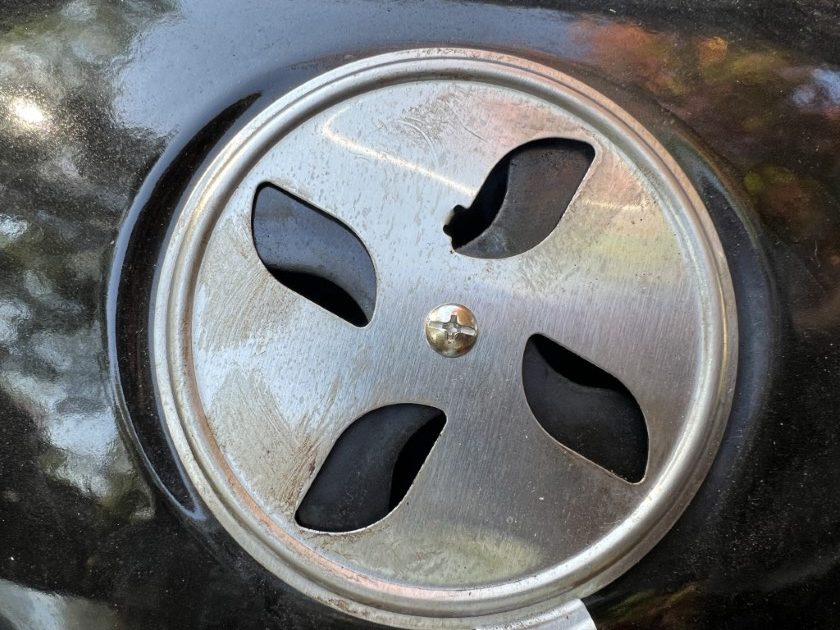
Getting The Temperature Right: Mastering the Top and Bottom Vents
Do you ever feel like your kettle grill has a mind of its own? Temperatures bouncing around, not behaving as you wish?
Don’t fret! The vents are your secret weapon to get it right.
Stability First
The key before starting to mess with the vents is ensuring your grill’s temperature is stable.
How do you know? If the temperature remains constant for about 15 – 20 minutes, you’re golden!
When initially starting the kettle, it takes 20 – 30 minutes to heat up and stabilize.
Top Vent Tweaks
Once stable, you can make micro adjustments to the temperature.
A small nudge to the top vent (either opening or closing it by about 1/8) can shift your temperature by 10 – 15°F (5 – 8°C).
It’s like turning a thermostat knob but for your grill.
Waiting is Winning
After adjusting the vent, show some patience.
It’ll take another 15 – 20 minutes for the grill to settle at its new temperature.
It’s like giving your coals a short nap before they get back to work.
Bottom Vent Basics
The bottom vent is your backup singer, supporting the main act (top vent).
Use it when the top vent can’t quite hit those temperature high notes or when your heat starts to wane.
Remember, the vents are more than just openings. They’re your grill’s lungs, breathing life (and heat) into every cookout.
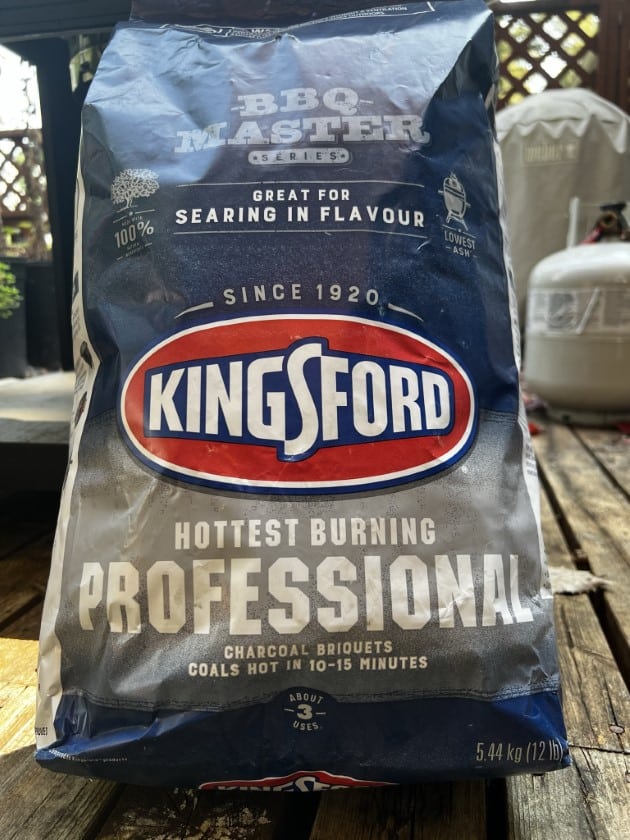
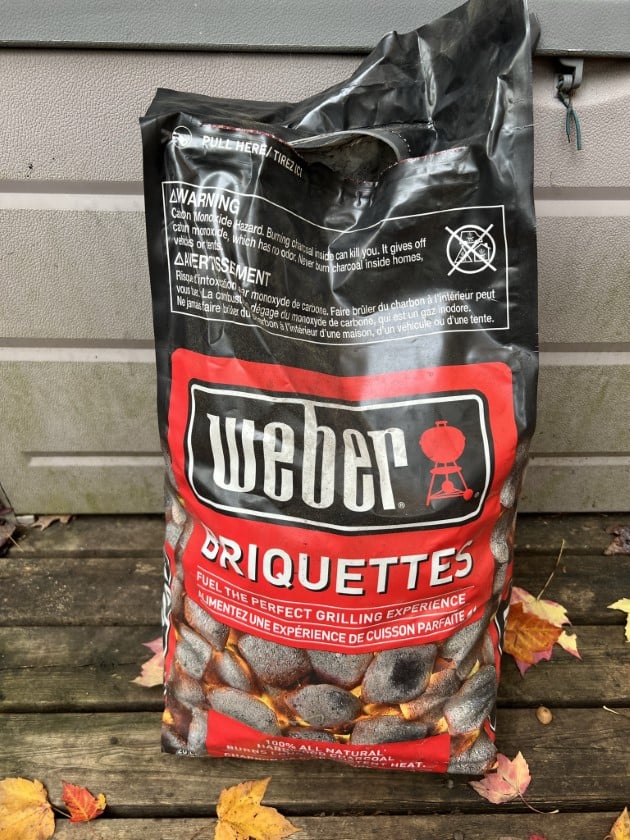
Kingsford vs Weber Charcoal Briquettes: Brand Differences
Kingsford and Weber are top choices when it comes to briquettes. However, there is a noticeable difference in the size of briquettes between these two brands.
Weber briquettes tend to be larger and denser, and Kingsford’s smaller.
To match the volume of 100 Kingsford briquettes, you would need about 56 Weber charcoal briquettes. This is important because it directly influences the heat output and cooking duration.
The size difference is why our guide recommends different starting amounts of briquettes. Weber’s larger briquettes mean you need less of them to reach the same temperature.
Make sure to use the right number of briquettes based on the brand you are using.
Weber Kettle Vent Settings: Specific Temperature Control Guide
Target Temperature Table: Charcoal Amounts and Vent Settings
| Temperature Target | Hot Coal (Kingsford) | Hot Coal (Weber) | Fuel Supply (Kingsford) | Fuel Supply (Weber) | Cook Time | Stabilizing Time | Top Vent | Bottom Vent |
|---|---|---|---|---|---|---|---|---|
| 225-250°F (107-121°C) | 6 briquettes | 5 briquettes | 100 briquettes | 56 briquettes | 5 – 6 hours | 20-30 minutes | 1/8 to 1/4 open | 1/8 to 1/4 open |
| 225-250°F (107-121°C) Extended | 8 briquettes | 5 briquettes | 230 briquettes | 130 briquettes | 10 – 12 hours | 20-30 minutes | 1/8 to 1/4 open | 1/8 to 1/4 open |
| 275°F (132°C) | 30 briquettes | 16 briquettes | 80 briquettes | 50 briquettes | 2 – 3 hours | 20 minutes | 1/2 open | 1/2 open |
| 300°F (149°C) | 33 briquettes | 20 briquettes | 80 briquettes | 50 briquettes | 2 – 3 hours | 20 minutes | 1/2 to fully open | 1/2 to fully open |
| 325°F (163°C) | 40 briquettes | 23 briquettes | 80 briquettes | 50 briquettes | 2 – 3 hours | 20 minutes | 1/2 to fully open | 1/2 to fully open |
| 350°F (177°C) | 60 briquettes | 33 briquettes | 100 briquettes | 50 briquettes | 2 – 3 hours | 20 minutes | 1/2 open | 1/2 to 3/4 open |
| 375°F (191°C) | 63 briquettes | 33 briquettes | 100 briquettes | 50 briquettes | 2 – 2.5 hours | 20 minutes | 1/2 to 3/4 open | 1/2 to 3/4 open |
| 400°F (204°C) | 70 briquettes | 38 briquettes | 120 briquettes | 60 briquettes | 2 – 2.5 hours | 20 minutes | 1/2 to fully open | 3/4 to fully open |
Note: This table provides an overview of the briquette amounts and vent settings. You may need to adjust these based on your kettle’s nuances.
How Many Hot Charcoal Briquettes to Start in Your Chimney?
Every dish and cooking style has an ideal temperature.
The trick is to start with as few hot coals as possible. Only light enough to get to the desired temperature.
We break down the specifics for each temperature mentioned below.
Where to Start The Vents?
Start with the vents open to the lowest recommendation. If the recommendation is 1/8 to 1/4, start with 1/8.
For cooks of 275 – 350°F (132 – 177°C) start with both vents open halfway.
Once the temp stabilizes fine tune using the top vent.
Only use the bottom vent if you can’t get the temperature high enough with the top vent fully open.
It’s easier to increase the temperature than trying to rein it in if it’s too high. So err on the side of caution.
How to Keep Your Weber Kettle at 225 – 250°F (107 – 121°C)
For a Shorter 5 – 6 Hour Cook: Perfect For Ribs
- Starting Hot Coals: Kingsford: 6 briquettes, Weber: 5 briquettes
- Fuel Supply: Kingsford: 120 briquettes, Weber: 60 briquettes
- Dump Hot Coals: On top of the fuel supply pile
- Cook Time: 6 – 7 hours
- Kettle Stabilizing Time: 20 – 30 minutes
- Top Vent: 1/8 to 1/4 open
- Bottom Vent: 1/8 to 1/4 open
For a Longer 10 – 12 Hour Cook: Perfect For Pulled Pork
- Starting Hot Coals: Kingsford: 8 briquettes, Weber: 5 – 6 briquettes
- Fuel Supply: Kingsford: 230 briquettes, Weber: 130 briquettes
- Dump Hot Coals: On the edge of the fuel supply pile
- Cook Time: 10 – 12 hours
- Kettle Stabilizing Time: 20 – 30 minutes
- Top Vent: 1/8 to 1/4 open
- Bottom Vent: 1/8 to 1/4 open
For this longer cook, the hot coals are positioned on the edge of one side of the fuel pile, not on top.
You may need to add more charcoal partway through for these long extended cooks.
Starting the hot coals on the side allows you to add more.
You do not want to dump the new briquettes on an already lit bed of coals. Create a new fuel pile beside the already lit ones so they ignite slowly.
How to Keep Your Weber Kettle at 275°F (132°C)
- Starting Hot Coals: Kingsford: 30 briquettes, Weber: 16 briquettes
- Fuel Supply: Kingsford: 80 briquettes, Weber: 50 briquettes
- Dump Hot Coals: On top of the fuel supply pile
- Cook Time: 2 – 3 hours
- Kettle Stabilizing Time: 20 minutes
- Top Vent: 1/2 open
- Bottom Vent: 1/2 open
How to Keep Your Weber Kettle at 300°F (149°C)
- Starting Hot Coals: Kingsford: 33 briquettes, Weber: 20 briquettes
- Fuel Supply: Kingsford: 80 briquettes, Weber: 50 briquettes
- Dump Hot Coals: On top of the fuel supply pile
- Cook Time: 2 – 3 hours
- Kettle Stabilizing Time: 20 minutes
- Top Vent: 1/2 to Fully open
- Bottom Vent: 1/2 to Fully open
How to Keep Your Weber Kettle at 325°F (163°C)
- Starting Hot Coals: Kingsford: 40 briquettes, Weber: 23 briquettes
- Fuel Supply: Kingsford: 80 briquettes, Weber: 50 briquettes
- Dump Hot Coals: On top of the fuel supply pile
- Cook Time: 2 – 3 hours
- Kettle Stabilizing Time: 20 minutes
- Top Vent: 1/2 to Fully open
- Bottom Vent: 1/2 to Fully open
How to Keep Your Weber Kettle at 350°F (177°C)
- Starting Hot Coals: Kingsford: 60 briquettes, Weber: 33 briquettes
- Fuel Supply: Kingsford: 100 briquettes, Weber: 50 briquettes
- Dump Hot Coals: On top of the fuel supply pile
- Cook Time: 2 – 3 hours
- Kettle Stabilizing Time: 20 minutes
- Top Vent: 1/2 open
- Bottom Vent: 1/2 to 3/4 open
How to Keep Your Weber Kettle at 375°F (177°C)
- Starting Hot Coals: Kingsford: 63 briquettes, Weber: 33 briquettes
- Fuel Supply: Kingsford: 100 briquettes, Weber: 50 briquettes
- Dump Hot Coals: On top of the fuel supply pile
- Cook Time: 2 – 3 hours
- Kettle Stabilizing Time: 20 minutes
- Top Vent: 1/2 to 3/4 open
- Bottom Vent: 1/2 to 3/4 open (Start a little more than 1/2 open)
How to Keep Your Weber Kettle at 400°F (204°C)
- Starting Hot Coals: Kingsford: 70 briquettes, Weber: 38 briquettes
- Fuel Supply: Kingsford: 120 briquettes, Weber: 60 briquettes
- Dump Hot Coals: On top of the fuel supply pile
- Cook Time: 2 – 3 hours
- Kettle Stabilizing Time: 20 minutes
- Top Vent: 1/2 to Fully open
- Bottom Vent: 3/4 to Fully open
Always watch your grill and be ready to make adjustments as needed!
Maintaining Your Target Temperature on Your Weber Kettle Grill
With the Weber Kettle Grill, it’s not just about setting the right temperature. It’s about keeping it steady.
Struggling with constant temperature fluctuations? Not anymore.
Below, you’ll find a guide to seamlessly manage and adjust the temperature of your grill. Ensuring you cook to perfection every single time.
Understand the Importance of Stabilization
Before making any adjustments to your grill, make sure the temperature is stable.
A stabilized temperature is the bedrock of precision cooking.
It usually takes the Weber Kettle 20 – 30 minutes to stabilize initially. After any adjustments, wait for at least 15 minutes for stabilization.
The Role of Vents in Temperature Control
- Top Vent: This is your fine tuning tool. A slight adjustment (about 1/8 of a turn) can alter the temperature by 10 – 15°F (5 – 8°C). If the temperature has stabilized, this can be a precision instrument for you.
- Bottom Vent: Think of this as your major adjustment vent. If the top vent isn’t doing what you want, try messing with the bottom one. This can help you fine tune the grill’s heat. As your heat starts dying down, fully opening this vent can revive it. If you need to do this, and the cooking isn’t nearly done, it’s a cue to add more coals.
Using the Minion Method for Precision
To maintain a steady temperature, ensure you set up your coals correctly from the get go.
Rather than lighting up a full chimney, which will superheat your grill.
The amount of hot coals you begin with determines how hot your grill will get. If targeting 300°F (149°C), only light enough coals to reach 300°F (149°C).
Coals and Fuel Supply
Your hot coals serve as the heat source, while your unlit coals function as the fuel supply.
Fewer hot coals to start result in lower heat, and more coals lead to higher temperatures. This approach helps you dial in the desired cooking temperature.
As mentioned earlier, if your target is 225 – 250°F (107 – 121°C), start with just 5 hot coals. It will maintain the grill’s temperature in this range.
Conversely, for a 400°F (204°C) cook, you’d start with a larger number like 70 hot coals (if using Kingsford).
Tips and Tricks for Controlling Charcoal Grill Temperature
Grilling perfectly involves using the right techniques and setups.
You also need to understand different external factors
Here are some invaluable tips and tricks to help you navigate the world of grilling:
Dealing with External Factors: How the Cooking Environment Affects Your Cook
- Ambient Temperature: During colder days, you might need to use a few extra coals. On hotter days, slightly reduce the amount of lit coals.
- Humidity: High humidity can affect the burning rate of charcoal. Adjust the vent settings to maintain your desired temperature. On particularly humid days, you might find that the coals burn a bit slower.
- Wind: Wind can dramatically affect the internal temperature of the grill. If it’s windy, position your grill to cut the wind’s effect or use windbreaks. Remember wind can speed up the burning rate of charcoal.
The Virtue of Patience
Every time you adjust the vents, wait for the temperature to stabilize.
It’s tempting to keep tinkering, but this can lead to large temperature fluctuations.
Patience is especially crucial after adding new charcoal or adjusting the vents. Give your grill the time it needs (typically 15 – 20 minutes) to stabilize to the new setting.

Put Marks on Your Grill So You Know Where 1/8, 1/4, 1/2, Etc, Open Is
Use a sharpie and add some marks.
Open the bottom vent 1/8th of the way and mark a mark.
Next open it 1/4 of the way and make another mark.
Continue for 1/2 and 3/4.
Now You Can Control Temperature With Military Precision
Mastering temperature control on your Weber Kettle Grill may seem daunting initially. But with practice, patience, and a bit of dedication, you’ll be grilling to perfection in no time.
Remember, every Weber Kettle has its own personality.
The more you cook with it, the more you’ll understand its behavior and nuances.
Embrace the learning curve.
Soon enough, you’ll be the talk of the town for your impeccable BBQ skills.
Frequently Asked Questions
How do I adjust the temperature on my Weber kettle?
You adjust the temperature on a Weber Kettle by using the top and bottom vents.
How do I keep my Weber kettle at 250?
Youou keep the Weber Kettle at 250 by starting with the correct amount of charcoal.
How do I set my Weber kettle to low and slow?
To set your Weber Kettle for low and slow start with a minimal amount of hot coals, then adjust the vents to limit airflow for a low and slow cook.
How do I make my charcoal grill hotter with vents?
Increase the hot coal quantity. Open the top and bottom vents to increase airflow, resulting in a hotter grill.
How do I keep my grill at a constant temperature?
Start with the right amount of hot coals for your target temperature. Adjust the vents slowly to stabilize the temperature.
Does putting the lid on a charcoal grill make it hotter?
Yes putting the lid on makes it hotter. The hot air circulates around instead of escaping.
How hot can a Weber kettle get?
The Weber Kettle can get really hot! With open vents and enough hot coals the kettle can exceed 700°F. Perfect for pizza!
should you adjust the bottom intake damper or the top exhaust damper?
Adjust both as needed, but always start with the top vent. Use the bottom vent if you can’t get adequate temperature control.
How Do I Get My Grill Temperature Down?
To get the temperature down reduce the airflow by adjusting the vents. Use fewer hot coals initially if consistently too hot.