Best Cooking Time for Boneless Ham on the Weber Kettle Charcoal Grill
Ah, the smoky aroma of grilling on a lazy weekend!
Few things in life are as rewarding as mastering the art of grilling, especially when you’re cooking a delectable whole boneless ham.
In this article we lay out the cooking time for boneless ham at various temperatures.
In This Article
- What is a Boneless Ham?
- Cooking Time and Temperature Table(Pre-Cooked Baked Ham)
- How Long Do You Cook a Boneless Ham at 225°F (107°C)
- How Long Do You Cook a Boneless Ham at 275°F (135°C)
- How Long Do You Cook a Boneless Ham at 325°F (163°C)
- How Long Do You Cook a Boneless Ham at 350°F (177°C)
- How Long Do You Cook a Boneless Ham at 375-400°F (190-204°C)
- Setting Up the Weber Kettle Charcoal Grill To Cook A Boneless Ham
- Boneless Ham Weber Kettle Grilling Techniques (Tips and Tricks)
- Checking for Doneness: How Do You Know Your Ham is Cooked?
- Wrapping Up The Cooking Time For Boneless Ham on the weber Kettle
- Frequently Asked Questions
What is a Boneless Ham?
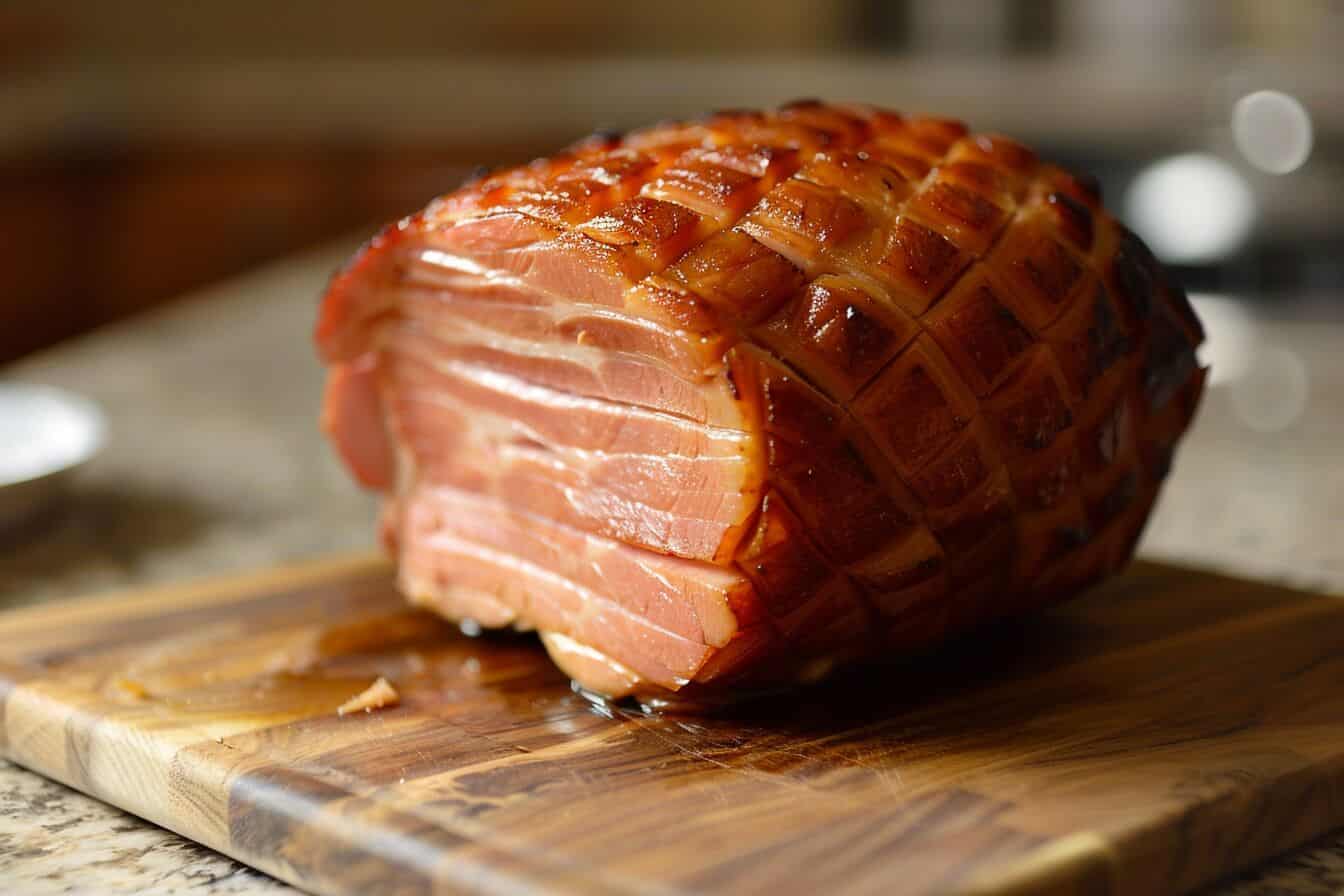
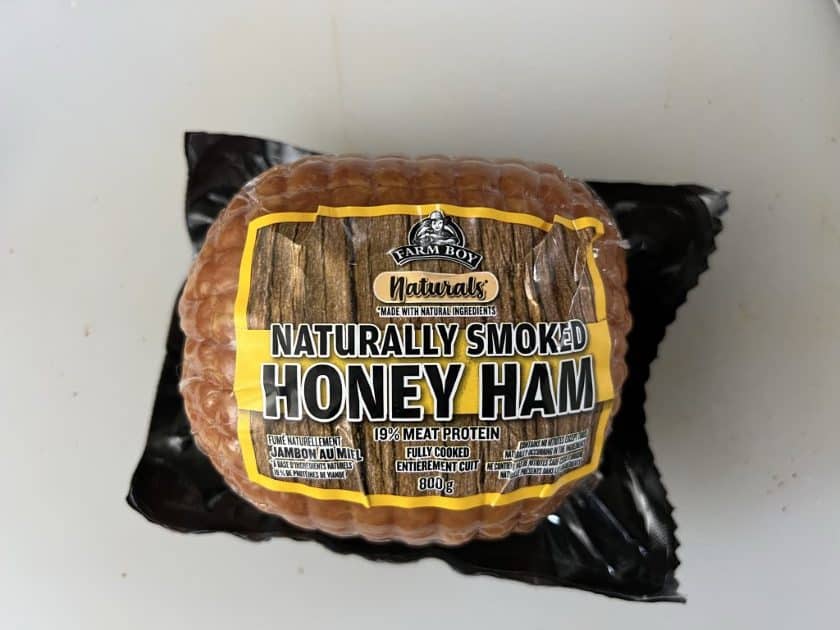
Boneless hams, as the name suggests, come without a bone. These hams are easier to slice and serve, making them a popular choice for family gatherings. They’re typically reformed into an oval shape, making them consistent in size and thickness, which can be beneficial for even cooking.
Whether you choose a whole or a half boneless ham, both offer an excellent taste and texture when grilled correctly.
My personal favorite? A whole boneless ham. There’s just something about its size and presence that makes a statement on the grill.
Cooking Time and Temperature Table(Pre-Cooked Baked Ham)
Understanding the right cooking time and temperature is the secret sauce to grilling perfection.
While a beautiful char on the outside of your ham is desirable, ensuring the inside is cooked to perfection is equally crucial.
Grilling a whole boneless ham or a half-boneless ham requires patience and precision, but trust me, the results are worth the wait!
Cooking Time and Temperature Table for Boneless Ham
| Temperature (°F [°C]) | Approximate Cooking Time for Whole Boneless Ham | Approximate Cooking Time for Half Boneless Ham | Time per lb (0.45 kg) |
|---|---|---|---|
| 225°F (107°C) | 4.5 – 6 hours | 3 – 4.5 hours | 20-30 minutes |
| 275°F (135°C) | 3 – 4.5 hours | 2 – 3 hours | 15-20 minutes |
| 325°F (163°C) | 2.5 – 3.5 hours | 1.5 – 2.5 hours | 15 minutes |
| 350°F (177°C) | 2 – 2.5 hours | 1 – 1.5 hours | 12-15 minutes |
| 375-400°F (190-204°C) | 1.5 – 2 hours | 45 minutes – 1.5 hours | 10-12 minutes |
Please remember that these are approximate timings. Factors like the exact weight of your ham, external temperatures, and the efficiency of your grill can alter these figures slightly.
Always keep a close eye on your meat and use a thermometer to ensure it reaches the desired internal temperature.
How Long Do You Cook a Boneless Ham at 225°F (107°C)
20-30 minutes per pound (0.45kg).
At this low and slow temperature, you’re essentially double smoking the ham (infusing it with a deep smoky flavor).
For a whole boneless ham, you’re looking at around 4 to 5 hours. A half-boneless ham would take approximately 3 to 4 hours.
How Long Do You Cook a Boneless Ham at 275°F (135°C)
15-20 minutes per pound (0.45kg).
This temperature is a sweet spot for those who want a blend of smokiness and juiciness.
A whole boneless ham would take about 2 to 3 hours, and a half-boneless ham about 1.5 to 2 hours.
How Long Do You Cook a Boneless Ham at 325°F (163°C)
15 minutes per pound (0.45kg).
Stepping up the temperature.
A whole boneless ham would take 1.5 to 2 hours, and a half boneless ham would require roughly 1 to 1.5 hours.
How Long Do You Cook a Boneless Ham at 350°F (177°C)
12-15 minutes per pound (0.45kg).
A hotter grill will get you quicker results.
Here, a whole boneless ham would be done in about 1 to 1.5 hours. While a half-boneless ham in about 45 minutes to 1 hour.
How Long Do You Cook a Boneless Ham at 375-400°F (190-204°C)
10-12 minutes per pound (0.45kg).
At these temperatures, you’re searing and cooking rapidly.
A whole boneless ham will be ready in 45 minutes to 1 hour, while a half-boneless ham can be done in 30 to 45 minutes.
It’s worth noting that these times are approximate. Depending on the exact size of your ham, weather conditions, and the efficiency of your grill, times might vary slightly.
But armed with this guide, you’re on the right path to ham perfection!
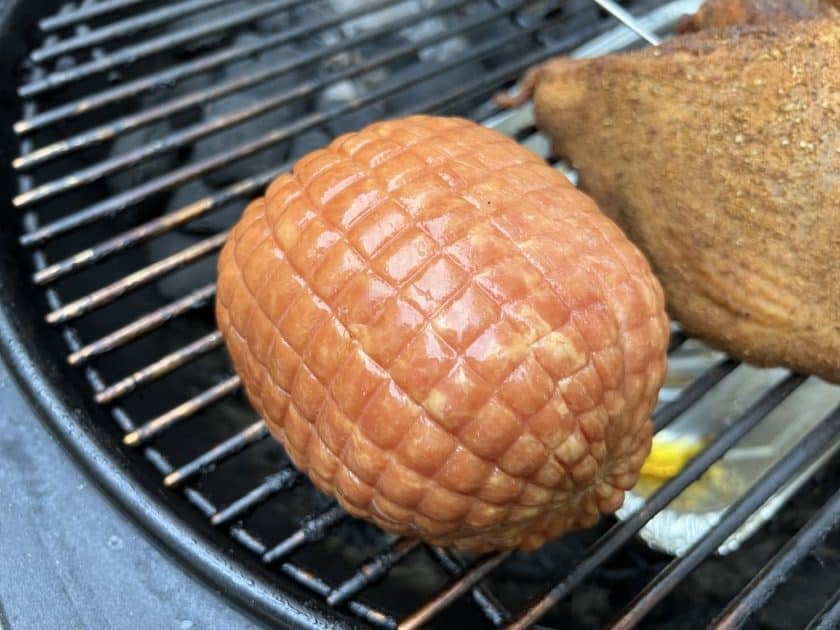
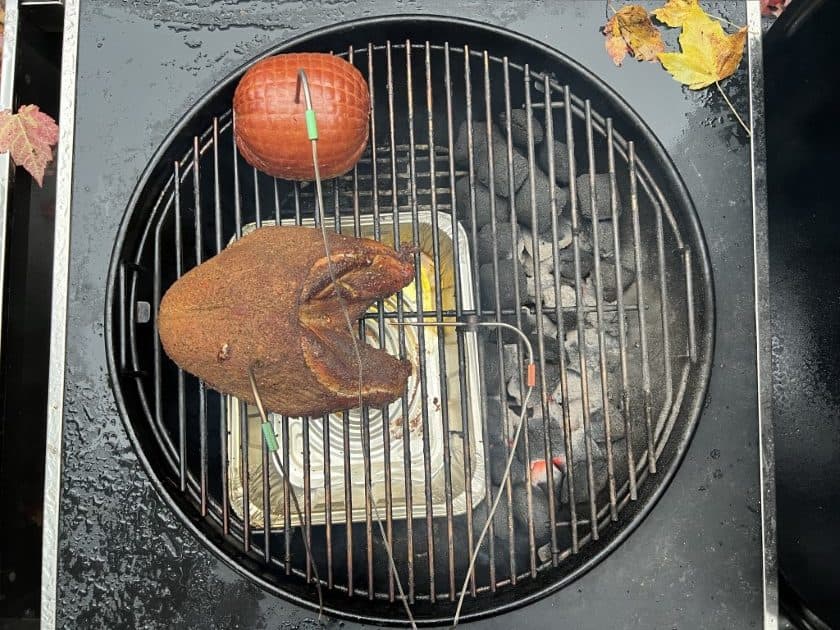
Setting Up the Weber Kettle Charcoal Grill To Cook A Boneless Ham
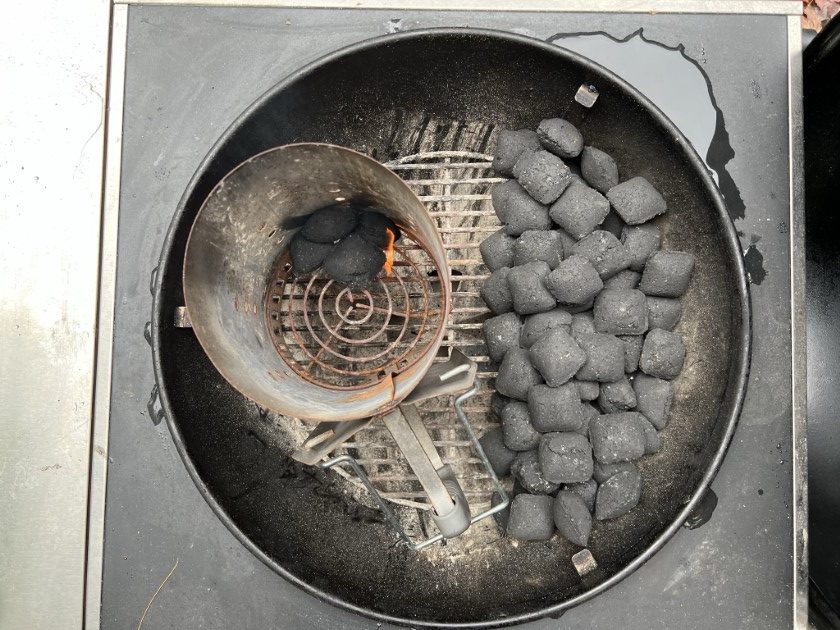
Two zone cooking on the Weber Kettle Charcoal Grill is a game changer, especially when grilling larger cuts like whole or half boneless ham.
By creating two distinct zones: one for direct high heat and the other for indirect lower heat, you have more control.
It allows for a perfect cook every time.
What Are the Steps To Set Up Your Weber Kettle?
1. Clean Your Grill
You want to begin with a pristine grill.
Clean grates ensure even cooking, reduce sticking, and decrease the chance of flare ups from old residues.
2. Arrange the Charcoal Using the Minion Method
The Minion method involves placing unlit charcoal at the grill’s bottom, topped with a few lit coals. This ensures a longer, more consistent burn.
For two zone cooking, arrange the charcoals on one side of the grill for the direct heat zone.
The opposite side remains charcoal free, acting as the indirect heat zone.
3. How To Manage The Airflow
Proper airflow is crucial for maintaining consistent temperatures.
Small adjustments are all you need. Keep the bottom damper in the sweet spot and adjust the top damper to fine tune the temperature. More air typically means a hotter burn.
Check out our guide on how to control the temperature on your Weber Kettle like a pro.
4. Preheat the Grill
Always allow your grill to preheat before introducing the ham.
This step guarantees that the grill has reached a steady temperature, promoting even cooking.
5. Add a Water Pan for Added Moisture
Place a pan filled with water under the indirect zone.
This trick helps keep the internal environment of the grill moist, ensuring your ham remains juicy throughout the cooking process.
Setting up with the two zone technique and using the Minion method takes a bit more preparation, but the reward is a beautifully grilled ham with minimal fuss during the actual cooking process.
Boneless Ham Weber Kettle Grilling Techniques (Tips and Tricks)
Even seasoned grill masters can benefit from a few additional pointers.
Grilling a whole ham can be an art, and every artist has a trick or two up their sleeve.
Here are some pro tips to ensure your grilling game is top notch:
1. Use Two Zone Cooking
As mentioned earlier, this method involves setting up the grill with a hot zone (direct heat) and a cooler zone (indirect heat).
Start the ham on the indirect side, allowing it to slowly come up to temperature without the risk of burning or overcooking.
If you’re looking for a nice sear or caramelization, finish it off briefly on the direct side.
2. Keep the Lid Down: Looking Ain’t Cooking
Every time you lift the grill lid, you’re letting out heat and smoke.
Keeping the lid down traps heat and smoke, which not only helps maintain a consistent temperature but also imparts that delicious smoky flavor to the ham.
Resist the temptation and trust the process!
3. Basting or Mopping
Baste the ham with a marinade or sauce during the final stages of grilling.
This adds an additional layer of flavor and helps keep the ham moist.
4. Rotate the Ham
Every once in a while, rotate the ham to ensure even cooking.
This ensures that one side isn’t getting more heat than the other.
5. Use a Thermometer
Don’t leave grilling to guesswork, especially with large cuts of meat.
A meat thermometer is your best friend, helping ensure your ham reaches the desired internal temperature without overcooking.
6. Use Wood Chunks for Extra Flavor
If you’re looking for an extra smoky flavor, consider adding some wood chunks to your charcoal.
Woods like oak, apple, or cherry can add a delightful aroma and taste to your ham.
7. Always Have Extra Charcoal
There’s nothing worse than running out of fuel mid grill.
Keep an extra bag of charcoal handy just in case.
Remember, grilling is as much a science as it is an art.
By mastering these techniques and understanding the dynamics of your grill, you’ll achieve that perfect balance of smoky, juicy, and delicious every time.
Checking for Doneness: How Do You Know Your Ham is Cooked?
Ensuring your whole boneless ham or half-boneless ham is cooked to perfection is both an art and a science.
The last thing anyone wants is an overcooked or undercooked ham.
Here’s how to guarantee your ham is just right:
The Trusty Thermometer: How To Tell Your Ham is Cooked
This is your most accurate tool.
For hams, you’re reheating rather than cooking from raw since most hams are pre-cooked.
Aim for an internal temperature of 140°F (60°C) for optimal safety and flavor.
Insert the thermometer into the thickest part of the ham without touching any fat or bone.
Look and Feel: How Should Your Cooked Ham Look?
As your ham cooks, it’ll transform in appearance.
The exterior should have a beautiful golden reddish brown hue, and the meat should feel firm to the touch.
What Should the Natural Juices Look Like?
As you approach the end of the cooking time, you can make a small incision in the ham.
If the juices that come out are clear, it’s typically a good sign that the ham is done.
A note of caution: While it’s essential to ensure your ham is perfectly done, remember that most hams are pre-cooked. The goal is to reheat it adequately and infuse it with that lovely grilled flavor without drying it out.
Wrapping Up The Cooking Time For Boneless Ham on the weber Kettle
There you have it, now you know how to make the perfect ham on your Weber Kettle.
Hams are an easy thing to grill if you’re just starting out, so don’t be afraid to pick one up next time you’re out for groceries and fire up your kettle.
Frequently Asked Questions
How many minutes per pound do you cook a boneless ham?
Typically, 15-20 minutes per pound (0.45 kg) at 325°F (163°C).
What temperature should a boneless ham be cooked to?
140°F (60°C) for optimal safety and flavor.
How long does it take to cook a whole boneless ham?
For an average sized ham, around 2-3 hours at 325°F (163°C).
What is the best way to cook a toupie style ham?
Bake at 325°F (163°C) for 15-20 minutes per pound (0.45 kg).
Will this work with the butt of the ham as well?
Yes, but cooking times may vary slightly due to the thickness of the cut.