Weber Kettle Ribs: How to Smoke Baby Back Ribs (3 1 1 Method)
Ah, the Weber Kettle. The iconic dome of deliciousness that’s graced countless backyards and barbecues worldwide.
Not only is this humble contraption a versatile grill, but it’s also an incredible smoker.
And when it comes to smoking, is there anything more drool worthy than a rack of perfectly smoked baby back ribs?
But how do you get those ribs just right? That perfect balance of smoke, tenderness, and flavor?
Enter the 3-1-1 method. A time tested technique that guarantees your ribs will be the talk of the town (or at least your backyard).
I remember the first time I tried this method on my Weber Kettle. The result? Ribs so mouthwatering that even my vegan friend gave them a second glance!
Keep reading as we cook 2 racks of ribs on the Weber Kettle.
In This Recipe
- Weber Kettle Ribs Recipe Card
- What to Look for in Pork Ribs?
- Baby Back vs. Spare Ribs
- Preparation of Ribs
- Trimming the Ribs
- Applying Rub to Ribs
- Setting up the Weber Kettle
- How To Set the Weber Up for Low and Slow Cooking (225°F)?
- Putting the Ribs on the Weber Kettle
- Spritzing the Ribs
- The Magic of Wood Chunks
- Checking on the Ribs
- Wrapping the Ribs
- Determining When Ribs Are Done
- Saucing and Resting Ribs
- Wrapping Up Making BBQ Weber Kettle Ribs
- Frequently Asked Questions
Weber Kettle Ribs Recipe Card

Weber Kettle Ribs: How to Smoke Baby Back Ribs (3 1 1 Method)
Course: BBQ RecipesCuisine: American, BBQDifficulty: Easy4
servings30
minutes5
hours300
kcalPerfect bite through ribs on the Weber Kettle using the 3-1-1 method.
Ingredients
2 racks of baby back ribs
Your favorite rib rub (or homemade mix)
1 cup apple juice (for spritzing)
Wood chunks for smoking
Honey
Brown Sugar
BBQ sauce (Optional)
- Equipment
Weber Kettle grill
Charcoal
Chimney starter
Aluminum foil
Meat thermometer
Directions
- Prepare the Ribs: Remove the membrane from the back of the ribs. Apply a generous amount of rib rub on both sides.
- Set Up the Weber Kettle: Using the Minion Method, pile 120 briquettes on one side. Light 5 briquettes in a chimney starter and place on top of the unlit pile.
- Vent Settings: Adjust the bottom vent to 1/8th open and the top vent to 1/4 open to maintain a consistent 225°F.
- Smoke the Ribs: Place ribs bone side down on the grill grates opposite the coals. Add wood chunks over the coals for added smoke.
- Spritz: After 2 hours, spritz ribs every 30 minutes with apple juice to keep them moist.
- Wrap (Optional): After 3 hours, optionally wrap ribs in foil with a splash of apple juice, honey, brown sugar and return to the grill.
Recipe Video
Notes
- Use the bend test or toothpick test to check the ribs’ tenderness.
- Experiment with different wood chunks like hickory or cherry for varied flavor profiles.
Keep Reading to bBQ ribs Like a Pro
Get started making ribs now.
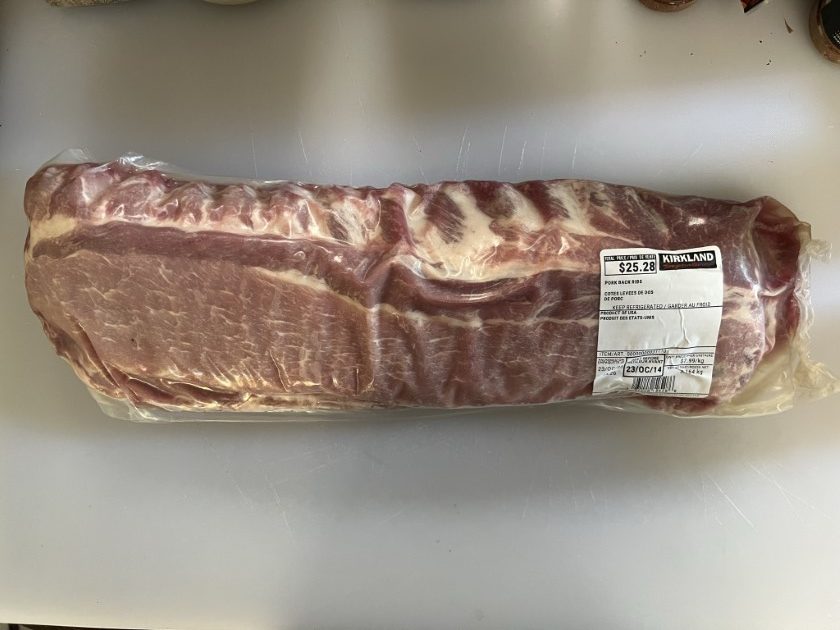
What to Look for in Pork Ribs?
Choosing the right pork ribs can feel like a daunting task. With so many options staring back at you from the meat counter, it’s no easy task.
Characteristics of Ideal Baby Back Ribs
Baby back ribs are the top of the line when it comes to pork ribs.
Look for pork ribs with:
- Consistent meat thickness.
- Slight marbling (which promises juiciness).
- A bone structure that isn’t poking out too much. Your ribs should have a good meat to bone ratio. It might cost a little more, but it’s absolutely worth it.
Remember, ribs curve naturally.
So don’t be alarmed if they’re not perfectly straight.
Freshness First
- Always opt for ribs that have a pinkish red hue.
- Avoid ribs that look too pale or have a grayish tint.
- Ensure that the packaging is intact without any damage.
- Always check the expiration date!
Baby Back vs. Spare Ribs
While we’re focusing on baby back ribs here, it’s worth noting the difference.
Baby backs are leaner and curvier. They come from the top of the ribcage.
Spare ribs are meatier and flatter. They hail from the belly side.
Both are delicious, but for this recipe, baby back ribs reign supreme!
Preparation of Ribs
The cornerstone of any great dish is the quality of its ingredients. This couldn’t be truer when it comes to smoking baby back ribs.
Start with top notch ribs, and half your work is done!
Storing and Thawing
If you’re not grilling them immediately, store your ribs in the coldest part of the refrigerator.
Planning to freeze them? Make sure they’re tightly wrapped before placing them in the freezer.
If your ribs are already frozen, make sure they are defrosted in the refrigerator a day or two before you plan to cook them.
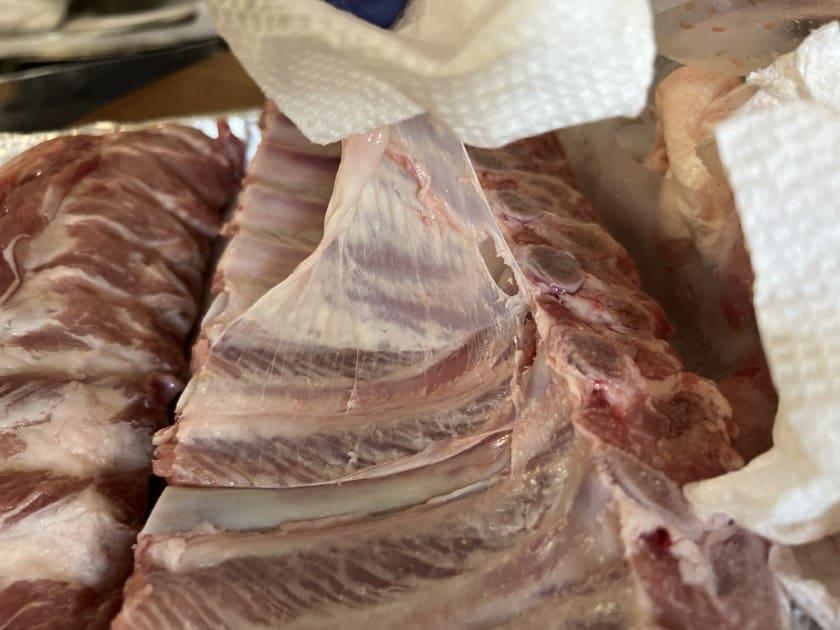
Removing the Membrane
Ah, the pesky membrane.
It’s that thin, plasticky layer on the bone side of the ribs.
Leaving it on? Expect your ribs to be tougher with less flavor absorption.
But worry not, removing it is a breeze! Just slide a butter knife beneath it, lift it, and gently pull it away.
Use a paper towel, it makes gripping the membrane much easier. It might take a try or two, but you’ll get the hang of it.
We’ve done a side by side comparison, one with the membrane removed and one without. Everyone who tried both preferred the ribs with the membrane removed.
Trimming the Ribs
One of the most overlooked steps in preparing ribs is the art of trimming.
Properly trimming your ribs can make a world of difference in the final product, ensuring even cooking and mouth watering presentation.
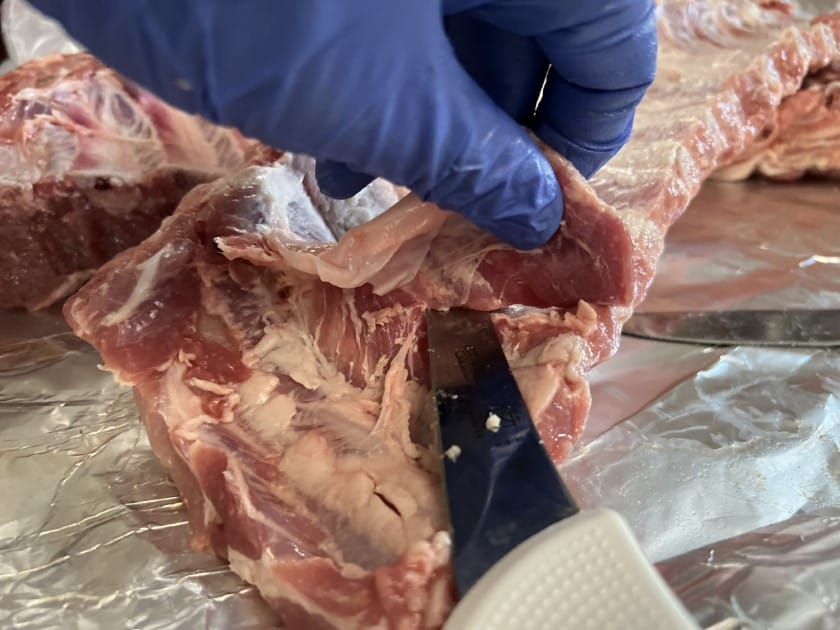
Trimming Excess Fat
While a little fat can add flavor and juiciness, too much can lead to uneven cooking and an overly greasy end product.
With a sharp knife, gently trim off any large, hanging pieces of fat.
Remember, it’s always easier to trim more later, so start conservatively.
Shaping for Even Cooking
To ensure your ribs cook uniformly, try to achieve a consistent shape.
Remove any small flaps of meat or bone that might burn or cook faster than the rest of the rib.
Don’t Waste the Trimmings
Now, here’s a tip! Don’t throw away those trimmed pieces.
They can be used to make delightful dishes like pork belly burnt ends or added to stews and broths.
I once used my trimmings to make a savory pork stew that was the perfect companion for a chilly evening.
Applying Rub to Ribs
Ah, the rub.
That magical mixture that infuses your ribs with layers of deep, tantalizing flavor.
While the technique of smoking plays a crucial role, a good rub can elevate your ribs from good to “Can I have your recipe?”.
The Significance of the Rub
A good rub acts as a flavor enhancer, forming a crust or “bark” as the ribs smoke.
This bark not only adds taste but also gives that irresistible, finger licking texture that rib enthusiasts crave.
Classic Rib Rub Recipe
Here’s a simple yet mouthwatering rub recipe I swear by:
- 3 tbsp brown sugar
- 2 tbsp paprika
- 1 tbsp salt
- 1 tbsp black pepper
- 1 tsp onion powder
- 1 tsp garlic powder
- 1/2 tsp cayenne pepper (for that kick!)
Mix all the ingredients thoroughly, and voila, your rub is ready!
For a twist, consider adding ingredients like dried herbs or even a touch of coffee for an added depth of flavor.
The Art of Applying Rub
For an even coat, sprinkle the rub generously over the ribs and use your hands to press and spread it across every nook and cranny.
Remember, the rub isn’t just for the top.
Flip those ribs and make sure the bottom gets some love too.
Rubbing those spices in is like giving the meat a good massage. Don’t rush it!
Setting up the Weber Kettle
Everyone knows the Weber Kettle is a skookum choocher when it comes to grilling!
But with the right setup, it can be a champion smoker too.
Assembling and Preparing the Weber Kettle
Before you even think of firing it up, ensure that your Weber Kettle is clean, especially the grates.
Any residual grease or leftover food bits can affect the taste of your ribs.
I like to clean the grill with some scrunched up tinfoil. Ball it up into a wad and scrub the grill with it.
Position the charcoal grate at the bottom, and you’re set.
Choosing Your Fuel
For smoking, lump charcoal is your best bet.
It burns hotter and longer, providing the consistent temperatures essential for smoking.
Unfortunately, I’m a chump with no lump, so I am using charcoal briquettes for this cook.
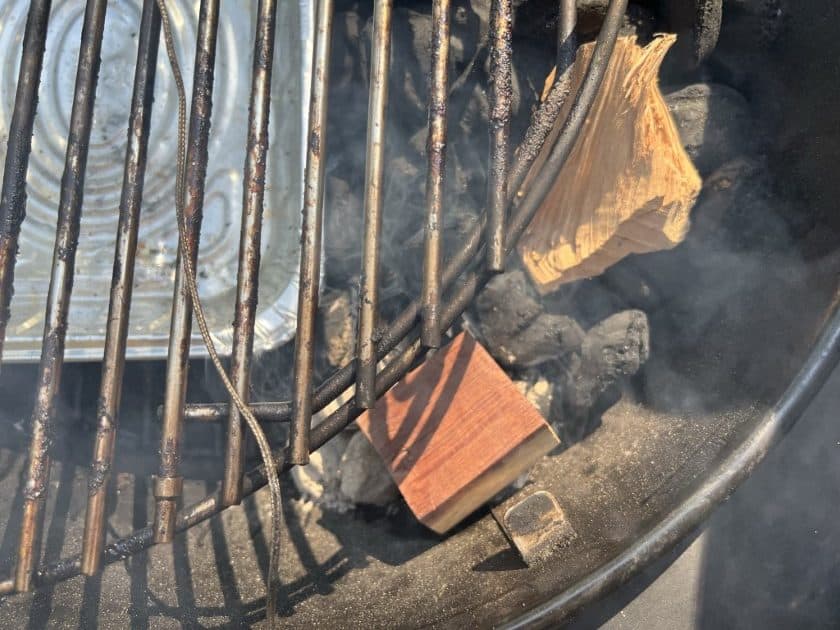
Flavorful Smoke
While charcoal provides the heat, it’s the wood that gives that smoky goodness.
I never use wood chips, I always go with chunks. Apple and cherry woods impart a milder, sweeter flavor, while hickory and mesquite offer a stronger, more robust smoke.
For this cook, I am going with cherry and wine barrel.
I recall a day when my buddy doubted the smoking capabilities of my Weber Kettle. He thought you could only get good barbecue out of a stick burner.
We spent the day smoking, and by evening, those ribs had him singing a different tune!
How To Set the Weber Up for Low and Slow Cooking (225°F)?
Mastering the Minion Method on the Weber Kettle
For BBQ pitmasters aiming for a long, low and slow controlled burn on their Weber Kettle, the Minion Method is the gold standard.
Named after its creator, Jim Minion, this technique is especially popular among those smoking meats that require extended cooking times.
Here’s a step by step guide based on a technique I’ve found incredibly effective:
1. Setting the Stage
Begin by ensuring your Weber Kettle is clean and free from ash residue. This ensures optimal airflow, which is crucial for the Minion Method.
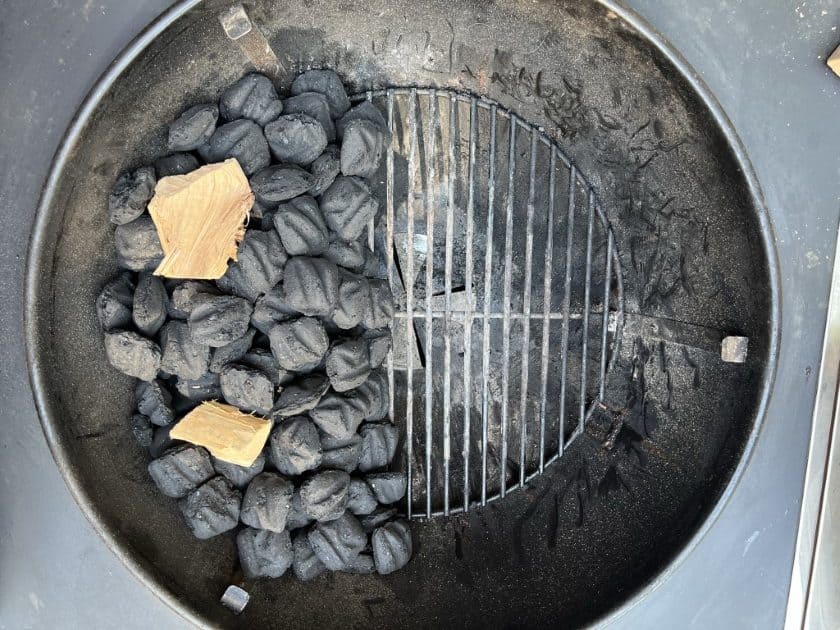
2. Piling the Briquettes
Place 110-120 briquettes into a tight pile on one half of the grill.
This should give you 7+ hours of cooking time.
This mound will act as your primary fuel source. The briquettes at the far side of this pile will be the last to ignite, ensuring a prolonged burn time.
3. Lighting It Up
Using a chimney starter (an invaluable tool for any BBQ aficionado) light up 5 briquettes (Yes, only 5!).
Let them burn in the chimney until they’re glowing hot and covered with a thin layer of white ash.
4. Placing the Lit Charcoal Briquettes
With a pair of tongs, carefully place the lit briquettes on top of one side of the piled briquettes in your Weber Kettle.
These few lit briquettes will gradually ignite the surrounding unlit ones, allowing for a controlled, steady temperature.
5. Vent Settings
For maintaining a rock solid temperature of 225°F, set your Weber’s bottom vent to 1/8th open and the top vent to 1/4 open.
This precise vent setting allows for optimal airflow, ensuring a consistent temperature throughout the smoking process.
There will be some slight differences due to your elevation, humidity, season, etc. But these settings work reliably for me and are a good starting point. Keep an eye out during your first few cooks and adjust accordingly.
I recall the first time I employed this technique on my Weber Kettle. The consistent temperature, prolonged burn time, and precision vent settings allowed me to achieve ribs that were impeccably smoked, with a tenderness that was simply out of this world.
Adjusting the Vents During the Smoke
Monitoring and adjusting the vents is a pivotal part of mastering the Minion Method, and with these settings, you’re on track for BBQ perfection.
The secret to maintaining a consistent smoking temperature in your Weber Kettle? It’s all in the vents!
After adjusting the vents, the smoker takes time to settle in. So make small adjustments and give it some time to see how your grill reacts.
During one of my early smoking attempts, I underestimated the vents’ power.
Halfway through, my temperature soared, and panic set in.
But with some quick vent adjustments (and a bit of nail biting), I salvaged the situation.
Lesson learned: always keep an eye on those vents and a little adjustment goes a long way!
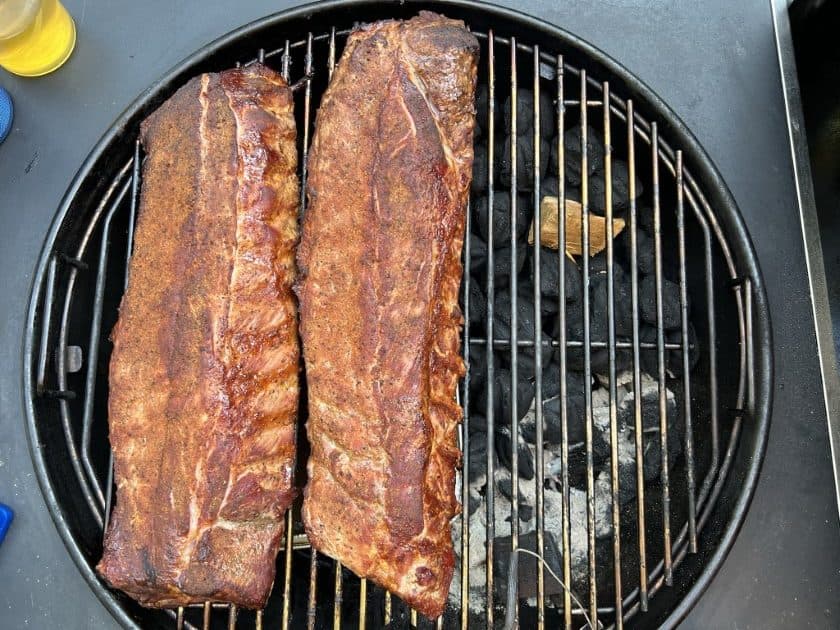
Putting the Ribs on the Weber Kettle
You’ve prepped your ribs, your Weber Kettle is smoking away.
Cue Bruce, “It’s time!”.
Placing the ribs correctly ensures even cooking and maximizes the infusion of that delectable smoky flavor.
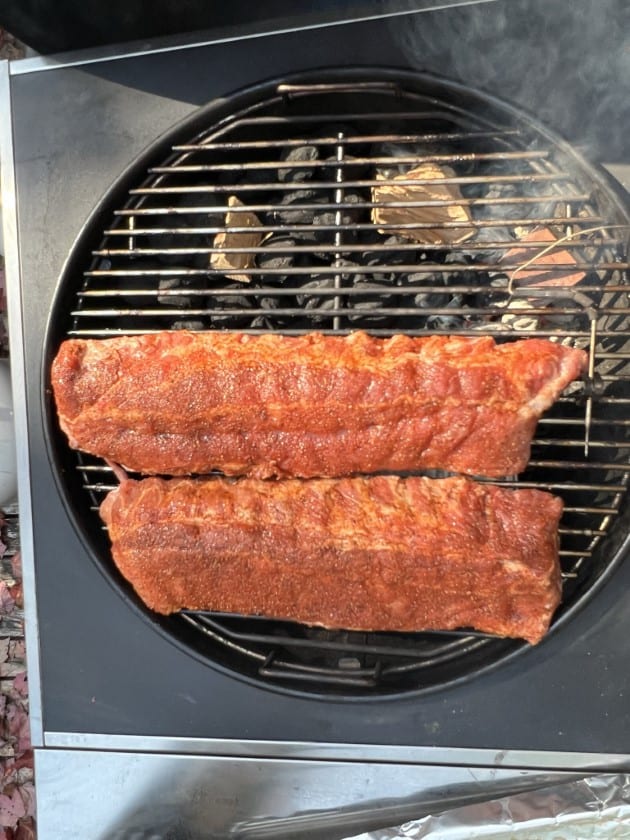
Positioning the Ribs
Remember the indirect method we talked about?
Place your ribs in the cool zone on the grill grates away from the coals. This is known as the indirect side of the grill.
If you’re using a rib rack, even better! It allows you to stand the ribs upright, ensuring they’re surrounded by smoke from all sides.
Maximizing Smoke Exposure
Make sure the meatier side of the ribs faces upwards.
This positioning allows the meat to absorb the maximum amount of smoke, translating to a deeper flavor.
Space the ribs adequately to ensure that smoke circulates around each rib.
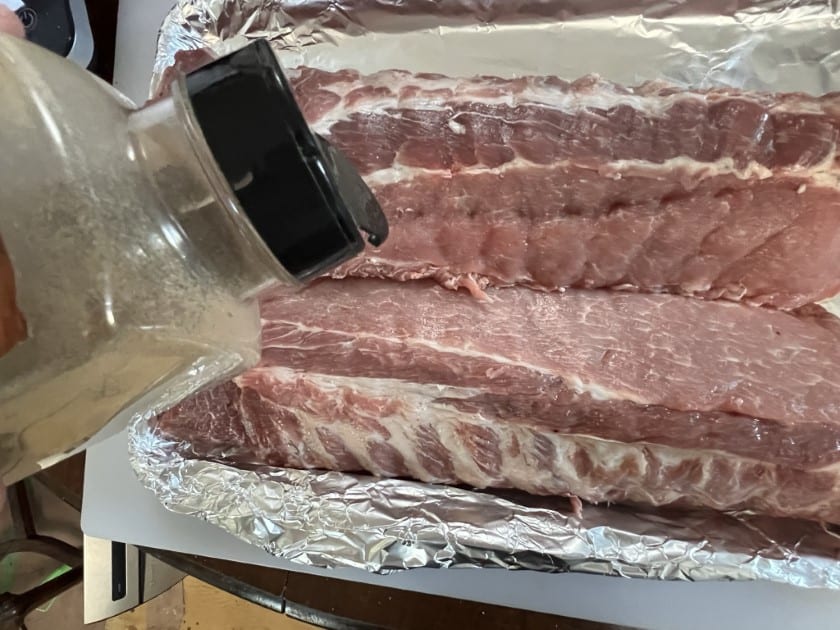
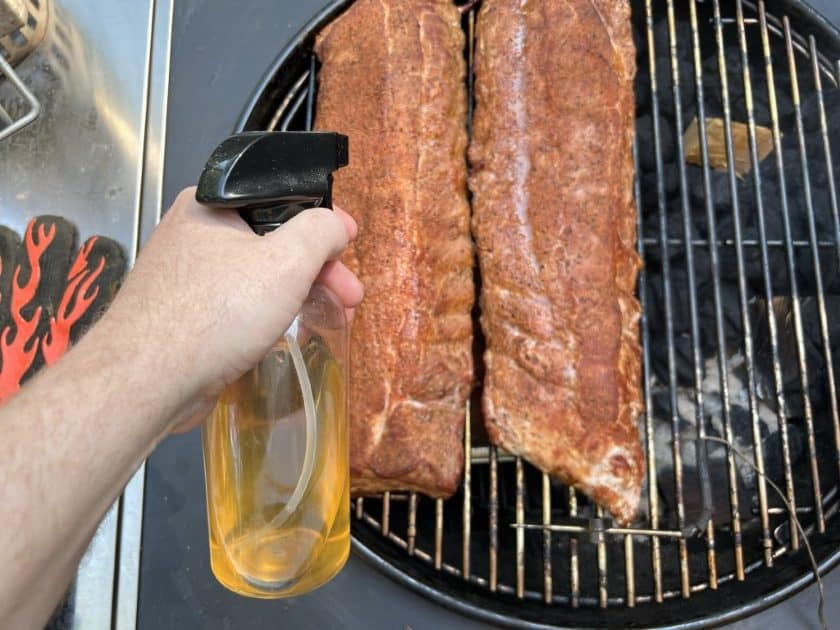
Spritzing the Ribs
Spritzing, a popular technique among BBQ pitmasters, involves misting the ribs with a liquid during the smoking process.
This simple step can make a significant difference in the outcome of your ribs.
Why Spritz?
Spritzing keeps the surface of the ribs moist, preventing them from drying out during the long smoking process.
The moisture aids in smoke adherence, enhancing the smoky flavor infused into the ribs.
What To Use as a Spritz for Ribs?
While many opt for apple juice due to its mild sweetness, other liquids like apple cider vinegar, beer, or even water can be used.
Some pitmasters even blend liquids for a unique flavor profile.
How Often Should You Spritz Ribs?
A good rule of thumb is to start spritzing after the first two hours of smoking, and then every 30 minutes thereafter.
Ensure you’re quick to avoid letting too much heat escape from the grill.
Remember, while spritzing can be beneficial, it’s crucial not to overdo it. You want moist ribs, not soggy ones.
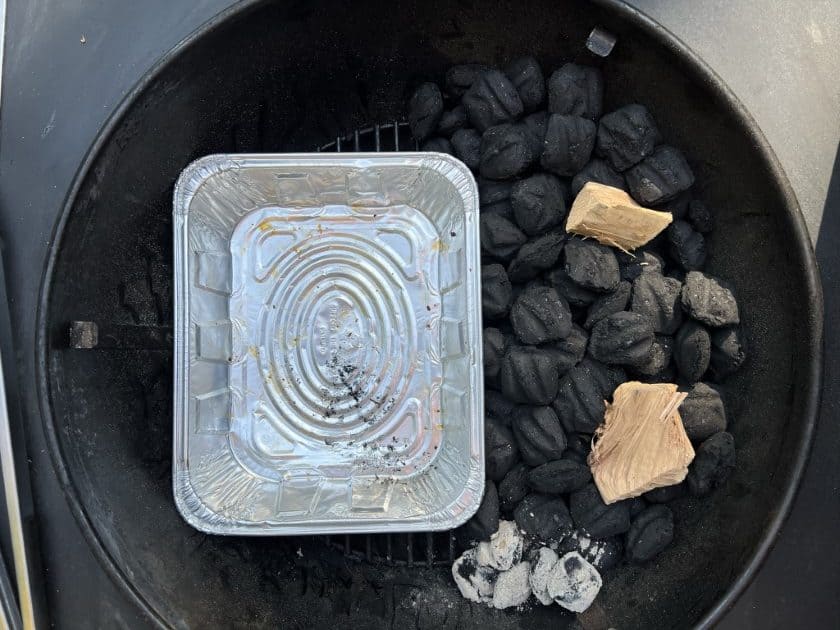
The Magic of Wood Chunks
Add your wood chunks directly on top of the coals.
As they smolder, they’ll release flavorful smoke that infuses into the ribs.
Whether you prefer the sweet undertones of applewood or the robust notes of hickory, the wood you choose will add an extra layer of depth to your ribs.
Checking on the Ribs
Patience is a virtue when smoking ribs, but knowing when and how to check on them is key to achieving perfect results.
Here’s a guide to keep you on track and ensure those ribs turn out impeccable every time.
1. Monitoring the Cooking Process
Resist the temptation to frequently lift the lid of your Weber Kettle. Doing so lets out heat and disrupts the cooking process. Instead, trust in your setup and let the ribs smoke undisturbed.
2. Using a Meat Thermometer
A reliable meat thermometer is a BBQ pirmaster’s best friend. About 4 hours into the smoking process, consider checking the internal temperature of the ribs. You’re aiming for a sweet spot of around 190°F to 203°F.
3. Avoid Excessive Peeking
Remember the old adage: “If you’re looking, you ain’t cooking.”
Every time you lift that lid, you’re allowing heat and smoke to escape, potentially prolonging the cooking time.
It’s natural to be curious, but patience pays off!
During one of my earlier BBQ adventures, I was a little too eager and couldn’t resist checking the ribs every half hour.
Not only did it extend my cooking time, but the fluctuating temperatures affected the meat’s tenderness.
Lesson learned: trust the process and let those ribs smoke in peace!
Wrapping the Ribs
The 3-1-1 method is a tried and true approach to achieving ribs that are tender, juicy, and full of flavor.
The second 1 in 3 1 1 involves wrapping and is crucial in this process, helping to lock in moisture and expedite the cooking.
Understanding the 3-1-1 Method
After smoking your ribs for the initial 3 hours, it’s time to wrap them.
This wrapping phase lasts for an hour and is followed by another unwrapped hour, allowing the ribs to firm up and develop that irresistible bark.

How and When to Wrap
Using heavy duty aluminum foil, lay out a piece large enough to encase your ribs.
Before placing them meat side down, consider adding some flavorful liquids like apple juice, honey, beer, or even a splash of bourbon.
Laying down a bed of brown sugar is also a popular method. It’s something I frequently do, and something I did while making this recipe.
Adding some liquid not only adds flavor but also assists in steaming the ribs, making them even more tender.
3. The Magic Inside the Wrap
The combined effects of the trapped heat, the flavorful liquids, and the ribs’ own juices work wonders during this phase.
The ribs essentially braise, soaking up flavors and becoming mouthwateringly tender.
Feel free to experiment and make the ribs your own.
One cook I decided to get a bit experimental and added a mix of apple juice and a touch of maple syrup to my wrap. The resulting ribs had a subtle sweetness that complemented the smokiness perfectly. It was a hit!
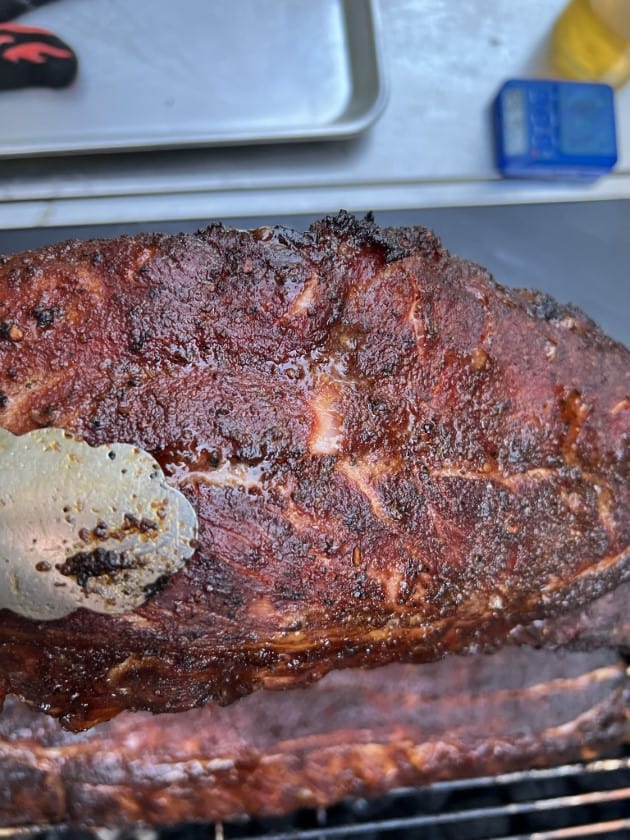
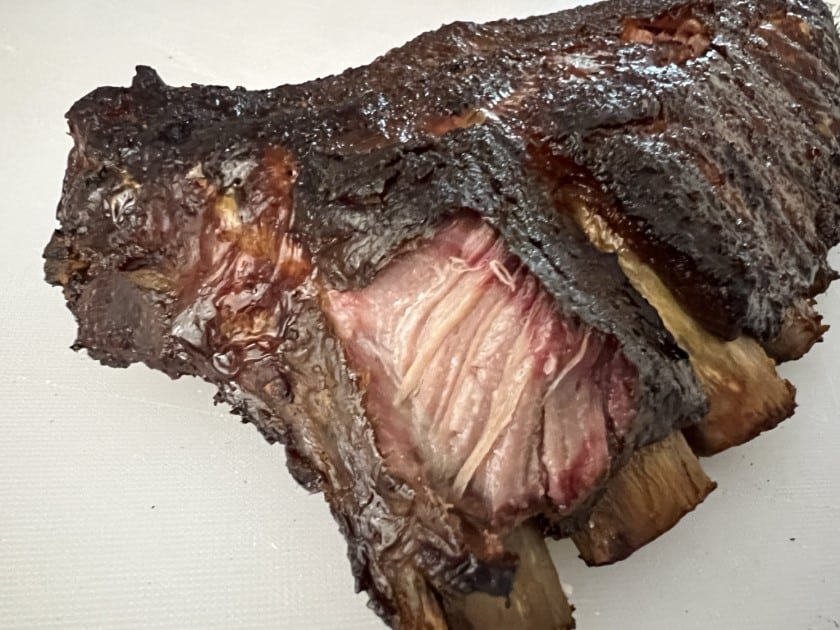
Determining When Ribs Are Done
No two slabs of ribs are the same, and while timing methods like the 3 1 1 can guide you, determining the exact moment when your ribs are perfectly done is an art.
Here’s how to ensure your ribs are just right every time.
Multiple Methods
Relying on a single method can be misleading.
Instead, combine a few techniques to be sure. A meat thermometer is great, but it’s not the only tool in your arsenal.
Check your ribs by:
- Internal Temperature: Aim for an internal temperature range between 190°F to 203°F. This is the sweet spot where collagen breaks down, making your ribs incredibly tender.
- Bend Test: Hold a slab of ribs with tongs, letting them dangle. If they bend and the surface cracks slightly, you’re on the right track. This indicates the meat’s tenderness.
- Toothpick Test: Take a toothpick (your temperature probe works great too) and poke the meat between the bones. If it goes through with little to no resistance, akin to poking softened butter, you’re golden!
Simply going by time is a good way to undercook your ribs. Always double check with multiple methods, ensuring perfection with each smoke.
Saucing and Resting Ribs
You’re in the home stretch! But before you dive into your mouthwatering ribs, there’s one final, crucial step: saucing and resting.
It’s the cherry on top that makes all the difference.
To Sauce or Not to Sauce
While some purists believe a good rib doesn’t need barbecue sauce, others swear by it.
The choice is yours!
Whether you opt for a homemade concoction or a store bought favorite, a good sauce can elevate your ribs to a whole new level.
If you choose not to sauce, you can always serve sauce on the side. I am going sauceless this time.
Applying the Sauce
During the last 20-30 minutes of cooking, slather your sauce onto the ribs.
Ensure you don’t sauce them too early, as the sugars in the sauce can burn.
Brush it on evenly, and let the ribs finish up, allowing the sauce to caramelize slightly and form a beautiful, glossy glaze.
The Importance of Resting
Once off the grill, let your ribs rest for at least 10-15 minutes.
This allows the juices to be redistributed, ensuring every bite is juicy and flavorful.
Rushing this step can result in drier ribs.
Wrapping Up Making BBQ Weber Kettle Ribs
From selecting the perfect slab of baby back ribs to savoring that final, flavorful bite, the journey of smoking ribs on a Weber Kettle is one of passion, patience, and culinary artistry.
The 3-1-1 method, combined with the versatile capabilities of the Weber Kettle, offers a foolproof way to achieve ribs that are tender, juicy, and bursting with smoky goodness.
So, why wait? Fire up that Weber Kettle, embrace the art of smoking, and treat yourself and your loved ones to a rib feast they won’t forget.
Subscribe to our mailing list to smoke the juiciest ribs you’ve ever eaten!
Frequently Asked Questions
How long to smoke ribs in a Weber kettle?
At 225°F ribs take 4 to 6 hours to smoke in a Weber kettle.
Should I wrap ribs in foil on a charcoal grill?
Wrapping ribs in foil retains moisture and speeds up cooking, but may soften the bark. It’s up to personal preference.
What is the best temperature to cook ribs on a charcoal grill?
The best temperature for ribs on a charcoal grill is 225°F to 250°F.
Do you flip ribs on a charcoal grill?
For smoking, no flipping is needed. For higher-temperature grilling, occasional flipping ensures even cooking.
Do you need to boil ribs before grilling?
No, don’t boil ribs. Boiling can speed up cooking but may remove flavor.